
The Ultimate Guide to Wall Mounted Examination Lights: Selection, Benefits & Installation
In the precise world of healthcare, where a subtle change in tissue color or a faint shadow can hold the key to a diagnosis, lighting is far more than a utility—it’s a fundamental diagnostic tool. For decades, medical professionals have relied on examination lights to illuminate their work, but the evolution from bulky, heat-generating fixtures to intelligent, ergonomic systems has revolutionized the clinical workspace. With over 15 years of experience equipping clinics, dental surgeries, and veterinary practices, we’ve witnessed firsthand how the right lighting solution can transform patient care, practitioner comfort, and operational efficiency.
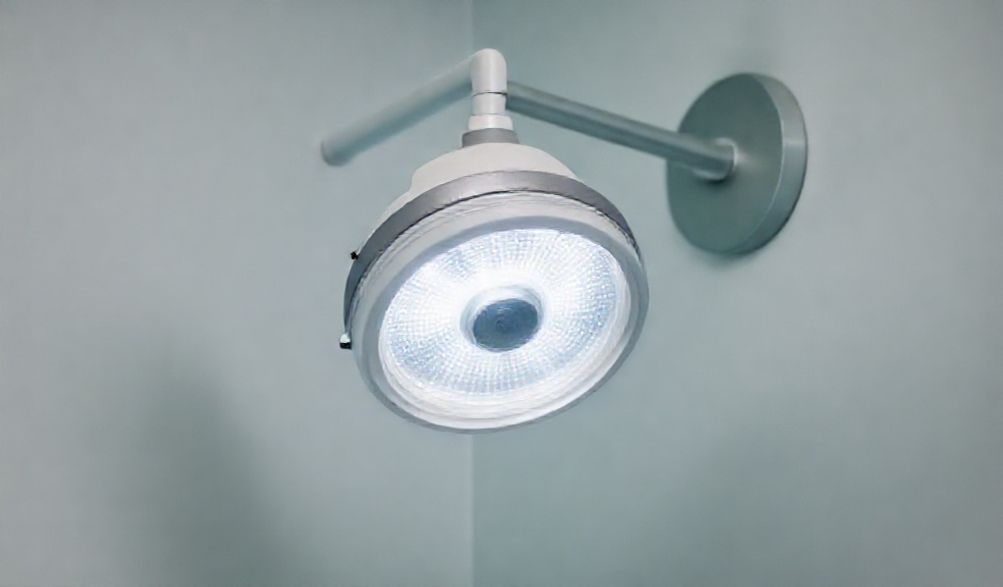
Enter the wall mounted examination light: a paradigm of modern medical design that marries superior functionality with space-saving ingenuity. This comprehensive guide is designed to be your authoritative resource. We’ll move beyond basic specifications to explore the practical benefits, critical technical features, and professional installation considerations that define a wise investment. Whether you’re outfitting a new treatment room or upgrading an existing one, understanding the nuances of the wall mounted examination light will empower you to create a safer, more accurate, and more efficient clinical environment.
Why Choose a Wall Mounted Examination Light?
Choosing the primary lighting for an examination or procedure room is a decision with lasting implications. While floor and ceiling-mounted options exist, the wall mounted examination light has become the gold standard for many modern practices, and for compelling reasons rooted in daily clinical experience.
Maximizing Space and Enhancing Safety
In today’s healthcare settings, square footage is often at a premium. A wall mounted examination light eliminates the need for a large, floor-standing base, instantly freeing up valuable floor space. This reduction in clutter is not merely aesthetic; it is a critical safety enhancement. By removing a significant tripping hazard from the busy zone around the exam chair or table, you create a safer environment for both staff and patients, particularly those with mobility issues.
Contrast this with alternatives: a floor lamp’s base consumes real estate and its power cord can snake across the floor, while a purely ceiling-mounted light often lacks the precise positional flexibility needed for intricate work. The wall-mounted design strikes the perfect balance, tucking the fixture’s infrastructure neatly against the wall while bringing the light source directly into the workspace via an articulated arm.
Unparalleled Flexibility and Precision
The true power of a high-quality wall mounted examination light lies in its articulated arms. These multi-jointed systems, often featuring spring-balanced or gas-charged mechanisms, allow the light head to be positioned with exceptional precision. A practitioner can effortlessly glide the light into the exact spot—whether it’s illuminating the posterior of the oral cavity for a dentist, a surgical site for a physician, or a paw for a veterinarian—and it will stay firmly in place without drift.
This translates directly to improved ergonomics. Instead of the practitioner contorting their body to align with a fixed light source, the light conforms to them. It reduces neck and back strain over long procedures, allowing the clinician to maintain a neutral, comfortable posture while ensuring the area of interest is perfectly illuminated from the optimal angle.
Consistent, High-Quality Illumination
At its core, an exam light must render truth. The quality of light is measured by its ability to reveal accurate color and detail, which is paramount for diagnoses ranging from detecting jaundice and cyanosis to identifying subtle inflammation or tissue demarcation.
Modern wall mounted examination lights with advanced LED technology deliver:
* High Color Rendering Index (CRI >90): CRI measures a light’s ability to reveal the true colors of an object compared to natural light. A CRI above 90 is essential for clinical accuracy, ensuring tissues, blood, and materials are seen in their authentic hues.
* Adjustable Color Temperature: The ability to tune the light from warm (e.g., 3000K) to cool daylight (e.g., 6000K) is invaluable. A warmer light can be soothing for patient comfort during general exams, while a cooler, bluer light maximizes contrast and visual acuity for detailed procedures.
* Effective Shadow Reduction: Through optical lens design and sometimes dual-lighthead configurations, these lights minimize obstructive shadows cast by the practitioner’s hands or instruments, providing clear, consistent illumination of the entire field.
This isn’t just about better visibility; it’s about better clinical outcomes. Accurate visual assessment is the first step in a successful diagnostic and treatment pathway.
Key Features to Consider Before You Buy
Navigating the technical specifications of a wall mounted examination light is crucial for selecting a model that will meet your clinical demands for years to come. Here’s a breakdown of the core features from an expert perspective.
Light Source Technology: LED vs. Halogen
The shift from halogen to LED represents the most significant advancement in medical lighting.
- Halogen: The traditional choice, halogen bulbs produce a bright, full-spectrum light. However, they are notoriously inefficient, converting over 80% of their energy into intense heat. This heat can discomfort patients and practitioners, and the bulbs have a short lifespan (typically 1,000-2,000 hours), leading to frequent, costly replacements.
- LED (Light Emitting Diode): LED is the unequivocal modern standard. These lights run cool, eliminating the risk of thermal burns or patient discomfort. They are extremely energy-efficient, reducing operating costs. Most importantly, high-quality LED modules boast extraordinary lifespans of 50,000 to 100,000 hours—effectively a decade or more of regular use—virtually eliminating bulb replacement. Their instant-on capability and superior dimming range make them the intelligent, reliable choice.
Recommendation: For any new purchase or upgrade, invest in an LED-based wall mounted examination light. The long-term benefits in cost, safety, and performance are substantial.
Understanding Technical Specifications
Don’t be intimidated by the specs; they are your guide to performance.
- Lux/Lumens (Brightness): Lux measures illuminance (light falling on a surface), while lumens measure luminous flux (total light output). For exam lights, look for a peak brightness of 15,000 to 60,000 Lux or more at a defined distance (e.g., 700mm). This ensures sufficient intensity for even deep-cavity illumination.
- Color Rendering Index (CRI): As noted, insist on a CRI of 90 or higher. This is non-negotiable for diagnostic accuracy.
- Adjustable Color Temperature: Seek a range, such as 3000K to 6000K, adjustable via a dial or touch control. This flexibility adapts the light to various procedures.
| Feature | Basic Model | Professional/Grade Model |
| :— | :— | :— |
| Light Source | LED | High-CRI LED |
| Peak Brightness | ~20,000 Lux | 50,000+ Lux |
| CRI | ≥85 | ≥95 |
| Color Temp Range | Fixed (e.g., 4500K) | Adjustable (e.g., 3000K-6000K) |
| Dimmability | Yes | Yes, with memory presets |
Mechanical Build and Ergonomics
The feel and durability of the light are as important as its output.
- Arm Reach & Movement: Consider the vertical and horizontal reach of the arm. A typical arm extends 24 to 48 inches from the wall. Ensure it has enough range to cover all potential positions of your exam chair/table. Look for arms with multiple joints and a full 360-degree rotation at key points for maximum positioning freedom.
- Counterbalance Mechanism: This is the heart of the “floatation” feel. High-quality spring or gas-spring systems allow the heavy light head to be moved with minimal finger pressure and stay rigidly in position once placed. Test the smoothness and stability.
- Build Materials: The housing should be made of robust, medical-grade materials like aluminum or high-impact polymers. The arm should feel solid, with smooth, sealed joints that resist the ingress of dust and fluids for easy cleaning.
Professional Installation and Optimal Placement Guide
A wall mounted examination light is a significant fixture that must be installed correctly for safety, performance, and longevity. This is not a typical DIY project.
Pre-Installation Planning: Electrical and Structural Needs
- Consult a Licensed Electrician: This is the first and most critical step. The installation will require connecting to a power source, often necessitating new wiring and a dedicated circuit or properly rated outlet.
- Locate Studs and Assess Wall Structure: The mounting bracket must be securely anchored into wall studs or substantial masonry. The light, arm, and head are heavy, especially when extended, creating significant leverage. Drywall or plaster alone will not support it. A stud finder is essential.
- Verify Load Requirements: Review the manufacturer’s specifications for the weight of the unit and the torque forces involved. Your electrician or installer will ensure the mounting hardware is rated to handle these loads safely.
Step-by-Step Mounting Best Practices
While specific instructions vary by model, the general professional process is:
1. Power Down: Turn off electricity to the circuit at the breaker box.
2. Template & Mark: Use the provided paper template to mark drill holes on the wall, ensuring they align with studs.
3. Drill & Mount Bracket: Drill pilot holes and securely fasten the heavy-duty mounting bracket to the wall studs using the supplied hardware (e.g., lag bolts).
4. Electrical Connection: The electrician will make the proper electrical connections within the light’s housing or a nearby junction box.
5. Attach Arm & Light Head: The articulated arm is then secured to the wall bracket, followed by the light head.
6. Test & Calibrate: Once powered, all movements, the counterbalance, and lighting functions are thoroughly tested.
⚠️ STRONG WARNING: Always, without exception, follow the manufacturer’s installation guide. Installation by qualified, licensed personnel is mandatory to ensure electrical and structural safety, and to keep the product warranty valid.
Strategic Placement for Different Medical Settings
Optimal height and location depend on your specific workflow:
* Dental Office: Typically mounted on the wall behind or slightly to the side of the patient’s head, aligned with the mid-sagittal plane. Height is often 5.5 to 6 feet from the floor to the pivot point, allowing the light to swing directly over the oral cavity.
* Medical Exam Room: Mounted on the wall adjacent to or behind the head of the exam table. Placement should allow the light to cover the patient’s body from head to mid-torso without obstruction from the practitioner standing at the side.
* Veterinary Practice: Similar to a medical room, but consider the variety of table sizes and animal types. A slightly higher default mount may provide better clearance for larger animals.
Maintenance, Safety, and Compliance
Protecting your investment and ensuring a safe clinical environment requires attention to care and standards.
Routine Cleaning and Care Protocols
Regular cleaning maintains performance and infection control.
* Daily/After Each Patient: Wipe down the light head, handle, and all arm surfaces with a soft cloth dampened with a mild, non-abrasive disinfectant approved for medical equipment. Avoid harsh chemicals, ammonia, or abrasive pads that can damage lenses or coatings.
* Lens Cleaning: Use a lens-specific cleaner or isopropyl alcohol (if permitted by manufacturer) and a microfiber cloth to keep the optical surface free of smudges and dust, which can scatter light.
* Arm Mechanism: Periodically check the arm joints for smooth movement. Do not lubricate them unless specified in the manual, as this can attract dust and debris.
Important Safety Standards and Certifications
Purchasing from a reputable supplier means investing in a compliant medical device.
* Key Certifications: Look for lights that carry relevant marks such as CE (European Conformity), ISO 13485 (Quality Management for Medical Devices), and for the US market, clearance as an FDA Class I or II Medical Device. These indicate the product is designed and manufactured to stringent safety and performance standards.
* IP Rating: An Ingress Protection rating (e.g., IP44) indicates resistance to dust and water splashes, an important feature for environments where fluids are present.
* Electrical Safety: Compliance with standards like IEC 60601-1 (medical electrical equipment safety) is essential.
Always request documentation of these certifications from your supplier. It is your assurance of a product built for the demanding clinical environment.
Frequently Asked Questions (FAQ)
Q: What is the typical lifespan of an LED wall mounted exam light?
A: High-quality LED modules are rated for 50,000 to 100,000 hours of use. With average clinical use, this translates to 10-20 years of service before any noticeable decrease in output, making them vastly more economical than halogen over time.
Q: Can I install a wall mounted light myself?
A: While the mechanical steps may seem straightforward, we cannot overstate the importance of professional installation. A licensed electrician ensures the electrical connection is safe and to code, and a qualified installer ensures the heavy unit is anchored with structural integrity. DIY installation voids warranties and creates significant safety risks.
Q: How much wall space or reach do I need?
A: You typically need 12-18 inches of clear vertical wall space for the mounting bracket. The critical measurement is the arm’s “reach radius.” Carefully review the manufacturer’s specifications for horizontal and vertical reach, and map this against your room layout and the planned position of your exam chair to ensure full coverage.
Q: Are these lights dimmable, and why is that important?
A: Yes, virtually all modern LED exam lights are fully dimmable. This is crucial for adapting light levels to different procedures—high brightness for surgery or detailed examination, lower levels for patient comfort during consultations or to reduce glare and eye strain for the practitioner during long sessions.
Q: What is the warranty period, and what does it cover?
A: Reputable manufacturers typically offer warranties ranging from 2 to 5 years, sometimes longer on the LED module itself. The warranty should cover defects in materials and workmanship. Always read the warranty terms carefully to understand what is included and the process for making a claim.
Conclusion
Selecting a wall mounted examination light is a strategic decision that impacts the daily efficiency, diagnostic confidence, and physical comfort of your healthcare practice. By opting for this space-saving solution, you invest in unparalleled flexibility, consistent high-quality illumination, and the modern reliability of LED technology. It is an investment that pays dividends in accurate assessments, improved practitioner ergonomics, and enhanced patient care.
We hope this guide has served as a comprehensive and trustworthy resource, empowering you with the knowledge to evaluate your options critically. For over 15 years, we have partnered with healthcare professionals to equip their practices with reliable, high-performance medical lighting. Consult with our expert team to discuss your specific clinical needs, room layout, and workflow; we are here to help you find the perfect wall-mounted lighting solution that will illuminate your practice for years to come.
p>