
The Ultimate Guide to Medical Headlamps: Illuminating Precision in Healthcare
Imagine a neurosurgeon navigating the intricate landscape of the brain, where a millimeter’s deviation can alter a life. Picture an emergency room physician assessing a complex wound at 3 a.m., or a dentist searching for a microfracture in a molar’s root canal. In these critical moments, what is the single most crucial tool for visual accuracy? While advanced imaging and skilled hands are vital, the fundamental bridge between a practitioner’s expertise and the patient is light.
This guide is dedicated to the unsung hero of clinical precision: the medical headlamp. Far more than a simple hands-free flashlight, it is a sophisticated, purpose-built instrument that directly impacts diagnostic accuracy, procedural success, practitioner ergonomics, and ultimately, patient outcomes. Compiled from industry standards, peer-reviewed ergonomic studies, and manufacturer specifications, this comprehensive resource is designed for surgeons, dentists, veterinarians, nurses, EMTs, medical students, and procurement specialists. We will illuminate the key features, diverse applications, essential selection criteria, and best practices to help you make an informed decision for your clinical needs.
What is a Medical Headlamp? Beyond Basic Illumination
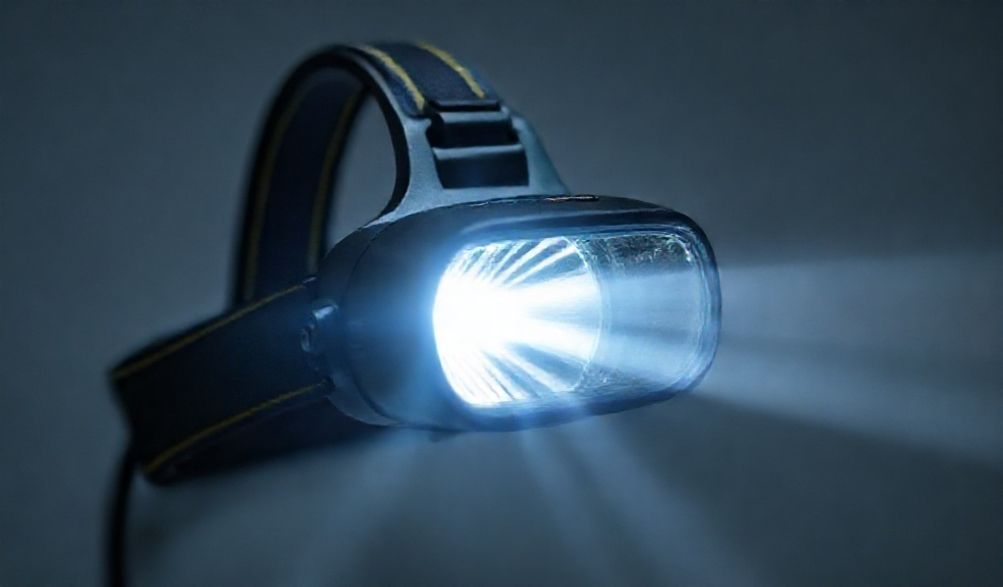
A consumer-grade camping headlamp and a medical headlamp may share a basic form factor, but the comparison ends there. The clinical environment imposes rigorous demands that transform this tool from a convenience into a critical piece of medical equipment.
Defining the Medical-Grade Standard
The “medical-grade” designation encompasses a suite of requirements absent from consumer products. First and foremost is sterilizability. Components that enter the sterile field, particularly the light head, must withstand repeated sterilization cycles—whether through autoclaving (steam sterilization), chemical disinfectants, or low-temperature hydrogen peroxide plasma. This dictates the use of specific, durable materials and sealed constructions.
Furthermore, Ingress Protection (IP) ratings are crucial. A medical headlamp must be resistant to fluids—blood, saline, and disinfectants—to ensure safety and longevity. An IP rating of at least IP54 (protection from dust and water splashes) is common, with many surgical models rated higher.
Finally, the quality of light is paramount. Clinical tasks require consistent, shadow-reduced illumination. Unlike a point source that creates harsh shadows, medical headlamps are engineered to provide even, diffuse light that reveals depth and texture, crucial for distinguishing subtle anatomical features.
Core Components and Anatomy
Understanding the anatomy of a medical headlamp demystifies its performance.
-
Light Source: Modern headlamps exclusively use LEDs for their efficiency, longevity, and cool operation. Two main types are prevalent:
- SMD (Surface-Mount Device) LEDs: Often multiple small LEDs combined to create a bright, sometimes adjustable beam.
- COB (Chip-on-Board) LEDs: A single, dense panel of LED chips that produces an exceptionally uniform and wide flood of light with minimal shadowing, highly prized in surgery and dentistry.
- Color Temperature: Measured in Kelvin (K), this defines the light’s “warmth” or “coolness.” Medical headlamps typically operate in the 4500K to 6000K range—a neutral to cool “daylight white.” This is essential for true tissue color rendering, allowing accurate assessment of tissue health, blood oxygenation (cyanosis vs. healthy pink), and subtle discolorations.
-
Power System: Reliability is non-negotiable. Most professional models use rechargeable lithium-ion battery packs worn on the waist or clipped to a belt, balancing weight distribution and offering extended runtimes (often 4-8+ hours on a single charge). Some systems are compatible with hospital-grade charging docks. The trend is toward USB-C charging for universal convenience.
-
Headband & Mounting: Comfort during long procedures is critical. Headbands are typically made of hygienic, wipeable materials like silicone or synthetic leather, with padded, adjustable straps. Some surgeons opt for clip mounts that attach directly to surgical loupes or a headpiece, integrating the illumination system with their magnification.
-
Light Pattern & Focus: The beam pattern must match the task. A tight spot beam offers high-intensity light at a distance for deep cavity work. A wide flood beam provides broad, even illumination for surface procedures or examinations. Many models feature adjustable focus to seamlessly transition between the two, with a deep depth of field to keep the area in focus even as working distance changes.
Critical Applications in Medical Specialties
The specific demands of each medical specialty shape the ideal headlamp profile.
Surgery & Operating Rooms
In the OR, light is a surgical instrument. The demands are extreme: high luminosity, impeccable shadow control, and unwavering reliability.
* General & Plastic Surgery: Require bright, white light with excellent color rendering to differentiate between tissue types, fat, and vasculature. Coaxial light paths (where light surrounds the line of sight) are key to minimizing shadows cast by the surgeon’s own hands and instruments.
* Neurosurgery & Spinal Surgery: Deep, narrow cavities demand a long-beam-distance spot light with intense lux (illuminance at the target) to see into depths. Stability is paramount to avoid light movement during delicate tasks.
* Ophthalmology & ENT: These specialties need extremely bright, focused light for micro-procedures, often integrated with magnification systems. Adjustable intensity is vital to avoid patient discomfort or retinal damage.
As Dr. Alisha Reynolds, a practicing plastic surgeon, notes: “Switching from a standard OR light to a high-CRI headlamp was transformative. I can now see the subtle differences between viable and compromised tissue with much greater confidence, which is critical in reconstructive work.”
Dental & Veterinary Practices
Both fields share a core need: hands-free, directed illumination into dark, confined cavities.
* Dentistry: Dentists and endodontists rely on headlamps to visualize the oral cavity without obstruction. The light must be cool (to avoid patient discomfort), have high CRI to distinguish tooth shades, caries, and soft tissue health, and be lightweight for all-day wear.
* Veterinary Medicine: From routine examinations to surgical procedures on animals of all sizes, veterinarians need durable, versatile headlamps. The ability to quickly switch between a flood beam for an exam and a spot for surgery is invaluable. Fluid resistance is a must-given the unpredictable clinical environment.
Emergency Medicine & Clinical Examinations
Here, speed, portability, and durability are king.
* EMTs & Paramedics: Headlamps must be instantly accessible, simple to operate with gloved hands, and offer reliable battery life for extended shifts. They are used for patient assessment in low-light conditions, wound management, and equipment checks.
* ER Doctors & Nurses: In the fast-paced ER, a headlamp allows for immediate, hands-free illumination during trauma assessments, wound suturing, vein location, or intubation, without waiting to reposition overhead lights.
* Bedside Procedures: For lumbar punctures, central line insertions, or wound dressing changes at the bedside, a personal headlamp provides direct, targeted light without disturbing other patients or relying on suboptimal room lighting.
How to Choose the Right Medical Headlamp: A Buyer’s Checklist
Selecting a headlamp is an investment in your practice. Use this checklist to prioritize features.
Prioritizing Key Technical Specifications
- Luminosity (Lumens) & Lux: Lumens measure total light output, but Lux (lumens per square meter) is what matters—it’s the brightness at the working distance. A headlamp might have high lumens but poor optics, resulting in low lux where it counts. For surgery, 10,000 to 50,000+ lux at a typical working distance (e.g., 20-30cm) is common. For examinations, 3,000-10,000 lux may suffice.
- Color Rendering Index (CRI): This is non-negotiable. CRI measures a light’s ability to reveal the true colors of objects compared to natural light. For medical use, a CRI of >90 (and ideally >95) is essential. Low CRI light can make tissues appear washed out or alter the perception of red (blood) and yellow (fat, pus), leading to diagnostic errors.
- Beam Distance and Field of View: Match the pattern to your task. Do you need to see the back of a deep wound (long-distance spot) or assess a large area like an abdomen (wide flood)? Adjustable focus offers the most versatility.
- Battery Runtime and Charging: Ensure the battery lasts longer than your longest expected procedure. Look for clear runtime specifications at the intensity level you’ll use most. Systems with hot-swappable batteries or dual battery packs provide uninterrupted power for marathon sessions.
Ergonomics and Usability Factors
- Weight & Comfort: The total system weight (headpiece + battery) should be distributed to avoid neck strain. Padded, adjustable headbands are essential for prolonged use.
- Ease of Cleaning: Can the critical components be wiped down quickly between patients? What is the full sterilization protocol? Know which parts are autoclavable (usually just the light head) and which require disinfection only.
- Intuitive Controls: Buttons or dials should be easy to locate and operate with gloved, slippery hands. A lockout feature to prevent accidental activation is a valuable plus.
Safety, Compliance, and Durability
- Regulatory Standards: Ensure the device carries relevant medical device markings. In the U.S., look for FDA Class I or II clearance. In other markets, CE marking (under the Medical Device Regulation) is essential. Compliance with IEC 60601-1, the standard for the safety of medical electrical equipment, is a strong indicator of rigorous design and testing.
- Build Quality & Warranty: Choose reputable manufacturers specializing in medical illumination. A robust warranty (often 2-3 years) reflects confidence in the product’s durability.
Maintenance, Safety, and Best Practices
A premium headlamp is a long-term investment. Proper care ensures performance and safety.
Proper Cleaning and Sterilization Protocols
Always follow the manufacturer’s instructions precisely. A general guideline:
1. Disassembly: Separate the light head from the cable and battery pack.
2. Cleaning: Wipe down all external surfaces with a hospital-grade disinfectant wipe.
3. Sterilization: Only the manufacturer-designated components (typically the light head) can undergo sterilization. Common methods include:
* Autoclaving (Steam): Use the correct cycle (e.g., 134°C for 5-10 minutes).
* Low-Temperature Methods: Such as hydrogen peroxide plasma (e.g., STERRAD) for heat-sensitive parts.
4. Drying & Reassembly: Ensure components are completely dry before reconnecting to the electrical system.
Maximizing Battery Life and Performance
- Follow the recommended charging cycles. Avoid constantly draining the battery to 0%.
- For long-term storage, charge the battery to approximately 50-60%.
- Use only the manufacturer-provided charger.
Safety Precautions for Practitioners and Patients
- Thermal Injury: Even with cool LEDs, prolonged exposure at very close range (<5cm) can generate heat. Be mindful of this when working on sensitive tissues.
- Glare: Position the light beam carefully to avoid shining it directly into the eyes of assistants, the anesthetist, or the patient (if awake).
- Electrical Safety: Never use a damaged cable or battery pack. Inspect the system regularly for wear.
FAQ Section
Q1: What is the ideal color temperature for a medical headlamp?
A: The ideal range is typically between 4500K and 6000K, which produces a neutral to cool white light that mimics daylight. This spectrum is proven to reduce eye strain during long procedures and, most importantly, allows for the most accurate visual perception of tissue colors and fluid states.
Q2: Can I use a high-powered camping headlamp for medical tasks?
A: It is strongly advised against. Consumer headlamps lack the high Color Rendering Index (CRI) necessary for accurate diagnosis, often have a bluish or yellowish tint that distorts tissue appearance, are not built for medical sterilization (posing an infection risk), and lack the safety certifications (like IEC 60601) required for clinical use.
Q3: How many lumens do I really need for surgical procedures?
A: Focusing on lumens alone is misleading. For surgery, look for the Lux rating at a specified distance (e.g., “50,000 lux at 20cm”). As a general reference, minor procedures may require 10,000-20,000 lux, while major deep-cavity surgery (like neurosurgery) often demands 40,000 lux or more. Consult with representatives who can provide these specific metrics.
Q4: Are all medical headlamp components autoclaveable?
A: No. Typically, only the detachable light head is designed to withstand autoclaving. The battery pack, cable, and headband are almost never autoclavable and must be cleaned using non-immersion methods like disinfectant wipes. Always consult the user manual for the validated sterilization method for each component.
Q5: How do I prevent the headlamp from fogging up during surgery?
A: Fogging occurs due to temperature differences. To minimize it: 1) Choose a headlamp with efficient LEDs that generate less heat. 2) Allow the headlamp to acclimate to the OR temperature before use. 3) Some models offer optional anti-fog coatings on the lens. 4) Ensure proper OR ventilation and temperature control.
Conclusion
A medical headlamp is far more than a simple light source; it is a fundamental extension of a clinician’s senses. Its value is defined by the quality of its illumination—high CRI and appropriate color temperature—combined with ergonomic design, robust sterilizability, and strict safety compliance. Investing in the right tool is an investment in patient care, diagnostic precision, and your own professional efficacy.
As you evaluate options, leverage this guide as your foundation. Consult with your institution’s clinical engineering team, engage with specialized medical equipment suppliers, and seek peer recommendations. Most importantly, arrange a hands-on demonstration. The best test is to evaluate the light quality on simulated tissue or in a realistic clinical scenario specific to your specialty.
Looking ahead, the field of medical illumination continues to evolve with trends like integrated high-definition cameras for procedural documentation and teaching, wireless connectivity for control systems, and even smarter, adaptive lighting that adjusts intensity automatically. By understanding the core principles outlined here, you will be well-equipped to evaluate not just today’s tools, but the innovations of tomorrow.
p>