
The Ultimate Guide to Examination Lights: Types, Uses, and How to Choose
You’re lying on the examination table, the crisp paper rustling beneath you. The clinician leans in, and with a soft click, a pool of brilliant, shadow-free light illuminates the area of concern. In that moment, that light is more than just a lamp; it’s an extension of the professional’s senses, a critical tool that bridges the gap between looking and truly seeing. For healthcare providers, this scenario is a daily reality. The quality of illumination can mean the difference between spotting a subtle lesion or missing it, between a confident diagnosis and an uncertain one.
This guide is designed to demystify the world of examination lights. Whether you’re a physician outfitting a new clinic, a dentist designing an operatory, a facility manager overseeing procurement, or a curious patient, understanding this essential equipment is key. We’ll move beyond the jargon to explore the critical technical features—like Lux, CRI, and color temperature—and translate them into real-world clinical benefits. Our goal is simple: to provide you with a clear, structured framework to understand the different types of examination lights and make an informed, confident decision tailored to your specific needs, from a quiet general practice to a bustling surgical suite.
What is an Examination Light and Why is It Critical in Healthcare?
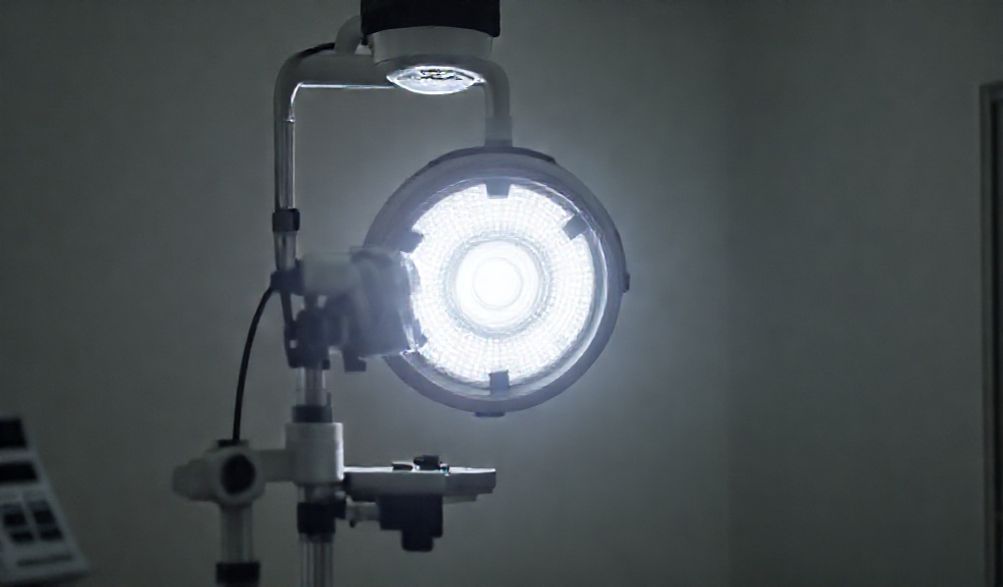
At first glance, an examination light might seem like a sophisticated desk lamp. In reality, it is a regulated medical device engineered for a singular, vital purpose: to provide optimal visualization of the human body’s surfaces and cavities.
Defining the Role: Beyond Simple Illumination
General room lighting is designed for ambient visibility and comfort. An examination light, however, is a precision instrument. Its job is to deliver intense, focused, and controllable light exactly where the clinician needs it, without casting confusing shadows or distorting colors. It must act as a neutral partner, revealing tissue as it truly is, not as the light source makes it appear. This makes it as fundamental to diagnosis as a stethoscope or an otoscope.
Core Requirements: Precision, Safety, and Comfort
To fulfill this role, a high-quality examination light must meet several core demands:
- Precision & Shadow Control: It must provide even, deep illumination that minimizes shadows cast by the clinician’s hands or instruments, which can obscure detail.
- True Color Rendering (High CRI): The light must have a high Color Rendering Index (CRI) to accurately display tissue colors. This is non-negotiable for assessing conditions like jaundice, cyanosis, rashes, or wound healing.
- Adjustable Intensity: Different procedures require different light levels. A light must be dimmable to avoid blinding glare during a pupil check yet capable of high output for a detailed wound inspection.
- Cool Light Operation: Traditional halogen bulbs emit significant heat, which can discomfort patients and dry out tissues. Modern lights use technology to minimize infrared (heat) radiation.
- Infection Control: Surfaces must be smooth, seamless, and easily cleanable with hospital-grade disinfectants to prevent cross-contamination.
Key Technical Specifications to Understand
Navigating product specifications can be daunting. Here’s a breakdown of the most critical terms you need to know.
Illuminance (Lux/Lumens): Measuring Light Intensity
Lux is the unit that measures illuminance, or how much light actually falls on a surface. Think of lumens as the total light output from the bulb, while lux is how bright that light makes your specific examination area.
- General Physical Exam: 1,000 – 3,000 Lux
- Detailed Examination (e.g., dermatology, wound care): 5,000 – 10,000 Lux
- Minor Surgical Procedures: 15,000 – 30,000+ Lux
Color Rendering Index (CRI): Seeing True Colors
CRI measures a light source’s ability to reveal the true colors of an object compared to natural sunlight (which has a CRI of 100). For clinical settings, a CRI of 90 or higher is essential. A low CRI can make healthy tissue look pallid or mask the subtle purple of a bruise, directly impacting diagnostic accuracy.
Color Temperature (Kelvin): The “Feel” of the Light
Measured in Kelvins (K), this describes the visual “warmth” or “coolness” of white light.
* Warm White (2700K-3500K): Yellowish hue, often used in ambient lighting for comfort.
* Neutral/Cool White (4000K-5000K): The clinical sweet spot. It provides a bright, alert, and neutral white that reduces eye strain and is excellent for general examinations.
* Daylight (5500K-6500K+): A very cool, bluish-white. It is sometimes used in surgical or dental settings for maximum brightness and contrast, but can be harsh for longer periods.
Depth of Field and Shadow Control
This refers to the light’s ability to provide consistent, even illumination deep into a cavity (like the oral cavity or a surgical site) without creating dark spots or sharp shadows. Advanced lights use multiple LED arrays or special reflector optics to create overlapping beams of light, effectively “filling in” shadows cast by obstructions.
Types of Examination Lights: Pros, Cons, and Best Uses
The mounting style of your light is a major decision point, impacting workflow, space, and budget.
Ceiling-Mounted Examination Lights
- Advantages: Frees up all floor and wall space, offers the greatest range of motion and positioning flexibility, and is out of the way when not in use. Ideal for sterile fields.
- Disadvantages: Requires professional installation into a structural ceiling, often the most expensive option, and is fixed to one room.
- Best for: Operating rooms, procedure rooms, high-traffic examination rooms, and any space where an unobstructed floor plan is critical.
Wall-Mounted Examination Lights
- Advantages: More cost-effective than ceiling mounts, easier to install, and offers excellent positioning flexibility with articulated arms. Saves floor space.
- Disadvantages: Can obstruct wall space where cabinets or other equipment might go. The range is limited by the arm’s reach from its fixed wall point.
- Best for: Standard consultation/exam rooms, minor procedure areas, emergency department bays, and dental operatories.
Floor-Standing / Mobile Examination Lights
- Advantages: Ultimate portability and flexibility. Requires no installation and can be moved from room to room as needed. Often the most budget-friendly upfront option.
- Disadvantages: Takes up valuable floor space, can be a tripping hazard, and is less stable (can be bumped or rolled away). The cable may pose a clutter issue.
- Best for: Multi-purpose rooms, home healthcare, temporary setups, clinics with frequently changing layouts, or as a supplemental light source.
Headlight Systems (for Clinicians)
While not a replacement for a primary exam light, headlights offer unparalleled, hands-free illumination that follows the clinician’s gaze. They are perfect for highly focused work in deep cavities (e.g., ENT, some dental procedures) or as a supplemental light source for shadow-free visualization.
How to Choose the Right Examination Light: A Step-by-Step Guide
Follow this practical checklist to narrow down your options and find the perfect light for your practice.
Step 1: Assess Your Primary Clinical Application
Ask yourself: What is the main purpose?
* General Physical Exams: Prioritize good, even light with excellent CRI and easy positioning.
* Dental Work: Requires a smaller, intense spot of light, often with a specific focal distance. Dental-specific mounts are common.
* Wound Care/Minor Surgery: Demands very high lux output (15,000+), exceptional shadow reduction, and cool light operation for patient comfort during prolonged procedures.
* Specialty Exams (e.g., Dermatology, Gynecology): May require specific light spectra (e.g., UV for fungal detection) or specialized form factors.
Step 2: Evaluate Your Space and Mounting Options
- Room Size & Layout: Is the room small and cramped? A ceiling mount saves space. Is it multi-purpose? A mobile light may be best.
- Ceiling Height & Type: Can the ceiling support a heavy-duty mount? Is there drop-ceiling access for wiring?
- Existing Infrastructure: Are there convenient electrical outlets? Is there clear wall space?
Step 3: Prioritize Key Performance Features
Create a “must-have” vs. “nice-to-have” list:
* Must-Have: CRI >90, Minimum Lux level for your procedures, dimming capability.
* Important: Color temperature preference (e.g., 4500K), depth of field performance.
* Compliance: Easy-to-clean surfaces, compatibility with standard disinfectants.
Step 4: Consider Ergonomics and Ease of Use
A light that is difficult to position will not be used properly. Test or look for:
* Smooth Movement: Do the arms move fluidly and stay in position without drifting?
* Handle Design: Is the handle intuitive and easy to grip, even with gloved hands?
* Control Placement: Are the intensity controls easily accessible?
Step 5: Plan for Safety and Compliance
Ensure any light you consider meets relevant safety standards:
* Electrical Safety: Should comply with IEC 60601-1 (medical electrical equipment standard).
* Regulatory Approvals: Look for marks like FDA clearance (USA), CE marking (Europe), or other local regulatory approvals.
* Thermal Safety: Verify the light has effective heat management to protect both patient and clinician.
Maintenance, Safety, and Best Practices
Protect your investment and ensure consistent performance.
Routine Cleaning and Disinfection Protocols
Always follow the manufacturer’s specific instructions. Generally, use a soft cloth with a mild detergent or recommended hospital-grade disinfectant. Avoid abrasive cleaners or sprays directly onto lenses or joints. Ensure the light is disconnected and cool before cleaning.
Periodic Performance Checks
Every few months, check:
* Light Output: Does it seem dimmer? Are there dark spots in the beam?
* Color Consistency: Has the white light shifted color?
* Mechanical Function: Do all joints move smoothly and lock securely?
Ensuring Electrical and Mechanical Safety
Regularly inspect the power cord for fraying, check that all mounting bolts are tight, and ensure the light does not have excessive “droop” or play in its arms. Schedule professional servicing as recommended by the manufacturer.
FAQ Section
Q1: What is the typical lifespan of an LED examination light?
A: High-quality LED modules are rated for 50,000 to 100,000 hours of use. In a typical clinical setting, this can translate to 15-20 years of service before light output significantly degrades. Factors like heat management and electrical surge protection can affect actual lifespan.
Q2: Can I use a standard bright lamp instead of a medical examination light?
A: It is strongly discouraged. Standard lamps lack the high CRI needed for accurate color assessment, often emit excessive heat, create harsh shadows, and do not meet medical electrical safety standards (IEC 60601). They are a liability for clinical diagnosis.
Q3: How much should I budget for a good quality examination light?
A: Prices vary widely. A basic, high-quality wall-mounted LED light may start in the mid-hundreds, while a premium ceiling-mounted surgical light with advanced optics can cost several thousand dollars. Frame this as a long-term investment in diagnostic accuracy and workflow efficiency, not just a piece of furniture.
Q4: What does “cold light” or “heat reduction technology” mean?
A: This refers to design features that filter out or minimize infrared (IR) radiation. While the light is bright, the heat projected onto the patient is drastically reduced. This is achieved through special dichroic reflectors (in halogen lights) or the inherent cool operation of LEDs, greatly enhancing patient comfort during long procedures.
Q5: Are there specific lights for dental examinations vs. general medicine?
A: Yes. Dental examination lights are engineered for close-range work. They typically have a smaller, more concentrated beam, a specific focal distance aligned with the dentist’s working position, and are almost always mounted on a delivery unit or a swing arm directly next to the chair. General medical lights have a broader field for examining larger body areas.
Conclusion
Choosing an examination light is a critical decision that directly impacts diagnostic confidence, procedural efficiency, and patient comfort. It is far more than a simple purchase; it is an investment in the foundational tools of clinical practice. By understanding the core technical specifications—particularly Lux for intensity and CRI for color truth—and carefully matching the light type to your specific clinical and spatial needs, you can select a tool that will serve you reliably for years to come.
We encourage you to use this step-by-step guide as a checklist to audit your current needs. When ready, consult with a reputable medical equipment supplier. Ask for demonstrations, compare specifications, and ensure the light feels intuitive in your hands. Making an informed choice ensures that every time you turn on that light, you are seeing your patient with absolute clarity.
p>