
The Complete Guide to Wall Mounted Examination Lights: Selection, Benefits & Installation
Imagine a physician leaning in to suture a delicate laceration. A dentist searching for the subtle margin of a cavity. A veterinarian assessing a pet’s wound. In each scenario, a single factor can mean the difference between a swift, accurate procedure and a struggle fraught with uncertainty: the quality of light. Shadows, glare, or inaccurate color can obscure critical details, impacting diagnosis, treatment efficacy, and patient comfort. This is where the humble مصباح فحص متعدد الاستخدامات transforms from a simple room fixture into one of the most vital tools in a clinical setting.
For medical, dental, and veterinary professionals designing or upgrading their practice, selecting the right illumination is a critical decision. This comprehensive guide serves as your authoritative resource on wall mounted examination lights, synthesizing industry standards, clinical ergonomics, and practical installation knowledge. We will illuminate the key benefits, break down the essential features you must consider, and provide clear guidelines for implementation. Whether you’re outfitting a new suite or retrofitting an existing room, this guide will equip you to make an informed choice that enhances your practice’s efficiency, safety, and standard of care for years to come.
What is a Wall Mounted Examination Light? Core Function & Design
At first glance, it may resemble a sophisticated desk lamp. But a wall mounted examination light is a purpose-built medical device, engineered to meet the rigorous demands of clinical environments. Its core function is to deliver consistent, high-quality, shadow-reduced illumination precisely where a practitioner needs it during examinations, diagnoses, and minor procedures.
Defining the Tool: Beyond a Simple Lamp
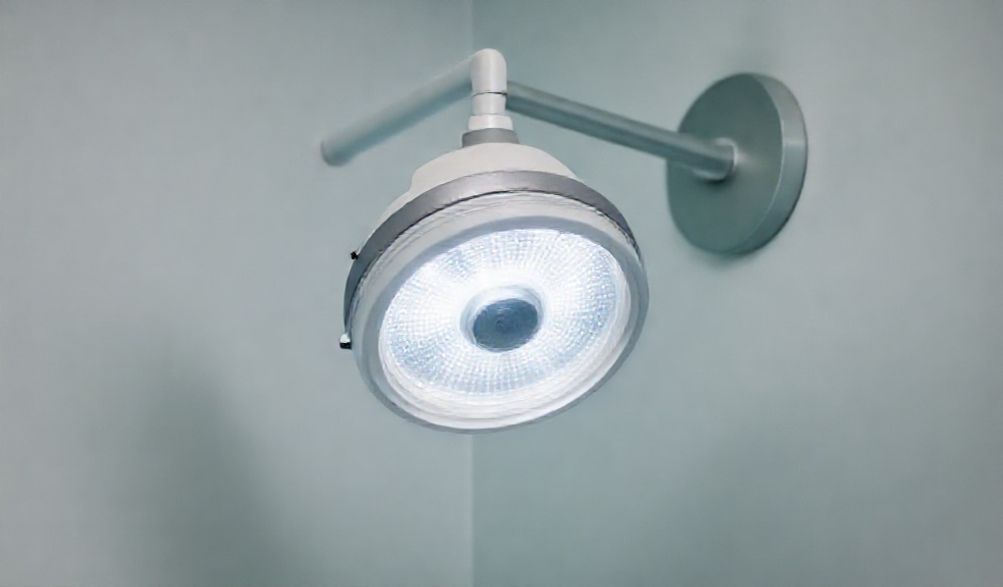
Unlike standard lighting, an examination light is designed for procedural accuracy. It typically consists of three main components:
1. The Wall Plate/Bracket: A robust, fixed mounting point securely attached to a wall stud or solid surface.
2. The Articulated Arm(s): A series of linked segments—often with spring-balanced or gas-charged mechanisms—that allow the light to be extended, retracted, raised, lowered, and rotated.
3. The LED Light Head: The business end, housing an array of high-performance LEDs, a precision optical system (like reflectors or lenses), and control interfaces. The design prioritizes even light distribution, minimal heat output, and accurate color rendering.
Primary Applications and Clinical Environments
The versatility of the wall mounted examination light makes it a staple across numerous settings:
* General Practice & Specialist Exam Rooms: For physical examinations, otoscopic/ophthalmoscopic procedures, dermatological assessments, and wound care.
* Dental Surgeries: Essential for intraoral examinations, cavity detection, restorative procedures, and oral surgery.
* Minor Procedure Suites: Used for suturing, incision and drainage, biopsies, and other outpatient surgeries.
* Emergency Departments & Urgent Care: Critical for rapid trauma assessment, foreign body removal, and acute wound management.
* Veterinary Clinics: For animal examinations, surgical prep, and minor procedures in treatment rooms.
In each environment, the light’s goal is the same: to reveal truth by eliminating visual ambiguity.
Key Advantages of Choosing a Wall Mounted Design
Why choose a wall-mounted model over other types? The benefits extend far beyond mere aesthetics, directly impacting daily workflow, safety, and infection control.
Superior Space Efficiency and Ergonomics
In a clinical room, every square foot is valuable. A wall mounted examination light eliminates the bulky floor stand, freeing up crucial floor space around the exam chair or table. This creates a less cluttered environment and removes a significant tripping hazard for staff and patients. Ergonomically, it allows the light to be positioned from an optimal angle without a base getting in the way of stools, instrument carts, or the practitioner’s feet, promoting a more organized and efficient workspace.
Enhanced Stability and Precision
When performing delicate tasks like suturing or placing a restoration, a shaky light is unacceptable. The fixed mounting of a wall light provides unwavering stability. Once positioned, it stays put, unaffected by accidental bumps to its base (since there isn’t one). This allows for precise, repeatable positioning—you can swing the light away for patient transfer and return it to the exact same spot with confidence.
Improved Infection Control and Cleanability
Infection prevention is paramount. Floor-standing lights have bases and casters that collect dust, debris, and pathogens, and they are notoriously difficult to clean around. A wall mounted examination light minimizes surfaces that contact the floor. The wall area around the mount is typically easy to access and disinfect, contributing to a higher standard of environmental hygiene.
Critical Features to Consider When Selecting a Light
Not all wall mounted examination lights are created equal. Understanding these key specifications will ensure your investment meets your clinical needs.
Illumination Quality: Lux, CRI, and Color Temperature
This is the heart of performance.
* Lux (Illuminance): This measures brightness at the target surface. For a general exam room, 40,000 to 100,000 Lux at the focal point is common. For deeper cavity work (dental, minor surgery), lights exceeding 160,000 Lux may be necessary. Ensure the light maintains a deep, even field of illumination, not just a bright hotspot.
* CRI (Color Rendering Index): Arguably more important than raw brightness. CRI measures a light’s ability to reveal the true colors of tissues and materials. A CRI of >90 (out of 100) is essential for accurately differentiating between shades of red (arterial vs. venous blood), healthy vs. inflamed tissue, and subtle tooth structures.
* درجة حرارة اللون: Measured in Kelvins (K), this describes the light’s “warmth” or “coolness.” A daylight white range of 4000K to 5500K is generally preferred as it provides a neutral, alert quality that reduces eye strain and supports accurate color judgment.
Mobility and Reach: Articulation & Arm Design
The best light is useless if it can’t reach where you need it.
* المفصلية: Look for multiple points of movement (degrees of freedom)—horizontal swing, vertical lift, rotation—to position the light head from almost any angle. A “float” feature, where the arm moves with minimal effort and holds its position, is a significant ergonomic advantage.
* Reach & Coverage: Measure the distance from your intended wall mount point to the center of your exam area. The light’s specifications will list its maximum horizontal and vertical reach. Ensure it can cover the entire zone without straining the arm’s limits.
* Tension Systems: High-quality lights allow you to adjust the arm’s tension. This ensures smooth movement that’s neither too stiff nor too loose, and it maintains the chosen position reliably.
Durability, Safety, and Compliance
This is medical equipment, not office furniture.
* المتانة: The housing should be made of medical-grade aluminum or robust, cleanable polymers. Seals should protect against dust and fluid ingress. The arm joints should feel solid and withstand years of repetitive use.
* Safety & Compliance: The light must comply with stringent electrical safety standards for medical devices, primarily IEC 60601-1. Look for relevant regional certifications such as علامة CE (Europe) or FDA Listing (USA). These are non-negotiable for patient and operator safety and for clinic accreditation.
Professional Installation and Maintenance Guidelines
Proper installation is critical to realizing all the benefits of your wall mounted examination light. Cutting corners here can lead to equipment failure, safety hazards, and voided warranties.
Pre-Installation Planning: Assessing Your Space
Careful planning prevents costly mistakes.
1. Mounting Location: Determine the optimal height and horizontal position relative to the exam chair/table. Consider the practitioner’s typical working position and the light’s arc of movement. The light should be accessible without the practitioner having to overreach.
2. Wall Construction: Identify what’s behind the drywall. Mounting must be into solid wood studs, concrete, or using appropriate heavy-duty toggle bolts for hollow walls. The fixture is heavy and under constant dynamic load.
3. Power Source: Ensure there is a nearby, properly grounded electrical outlet. Plan the cable route—some setups allow for internal cable management within the arm, while others use external tracks or conduits for a cleaner look.
The Installation Process: Best Practices
We strongly recommend professional installation by a qualified biomedical technician or electrician familiar with medical equipment. A proper installation generally follows these steps:
1. Using the manufacturer’s template, mark the drill points for the wall bracket.
2. Securely fix the heavy-duty bracket to the wall using hardware suitable for the wall type.
3. Assemble the articulated arm(s) and attach them to the wall bracket.
4. Make the electrical connection, ensuring all covers and strain reliefs are properly secured.
5. Perform final testing: check all movements for smoothness and stability, verify the light turns on/off and dims correctly, and ensure there is no flicker or electrical noise.
Routine Care and Maintenance for Longevity
With proper care, a high-quality LED light can last for decades.
* التنظيف اليومي: Wipe down the light head and arms with a soft, lint-free cloth dampened with a mild, non-abrasive disinfectant. لا ترش السائل مباشرة على الضوء أبدًا؛; spray the cloth first. Avoid harsh chemicals or abrasive wipes that can damage surfaces.
* Periodic Checks: Every few months, check the tension of the arms. Do they drift down or sag? Most manufacturers provide instructions for re-tensioning. Listen for creaks or catches in the joints.
* Inspections: Visually inspect power cables and connectors for any signs of fraying, cracking, or damage. Have any issues addressed by a professional immediately.
Comparing Wall Mounted vs. Alternative Examination Lights
Wall Mount vs. Ceiling Mount: A Matter of Flexibility vs. Coverage
- Ceiling Mounted Lights are excellent for large, multi-purpose rooms or operating theaters where maximum, unobstructed coverage from directly above is needed. They require significant structural planning, potential reinforcement, and are often more complex and expensive to install, especially in retrofit scenarios.
- Wall Mounted Lights offer superb lateral flexibility and are typically simpler and less invasive to install. They are the ideal choice for standard exam and procedure rooms, especially when retrofitting existing spaces where ceiling access is limited.
Wall Mount vs. Floor Stand: Permanent Efficiency vs. Portability
- Floor Stand Lights offer ultimate portability, allowing one light to be shared between multiple rooms. This can be cost-effective for very low-volume settings. However, they consume floor space, create tripping hazards, are less stable, and are harder to keep clean.
- Wall Mounted Lights represent a permanent investment in a room’s efficiency and safety. They provide superior stability, free up floor space, enhance infection control, and contribute to a more professional, organized environment. They are the clear choice for dedicated exam or procedure rooms.
قسم الأسئلة الشائعة
Q1: What is the typical lifespan of a high-quality LED wall mounted examination light?
ج: The LED light source itself is incredibly long-lived, often rated for 50,000 to 100,000 hours (which could be 20+ years of clinical use). In practice, the mechanical arm system may require service or re-tensioning long before the LEDs fail. Investing in a light with a well-built arm is crucial for long-term value.
Q2: Can I install a wall mounted light myself?
ج: It is strongly discouraged. These are heavy, expensive medical devices that must be securely mounted to handle constant movement. Improper installation can lead to the light falling, causing injury and equipment damage, and will almost certainly void the manufacturer’s warranty. Always use a certified installer.
Q3: How much brightness (Lux) do I really need for a general examination room?
ج: For general physical examinations and wound care, a light capable of 40,000 to 100,000 Lux at its focal point is usually sufficient. For tasks requiring illumination into deeper cavities—such as dental procedures, ENT exams, or minor surgical suites—look for lights in the 100,000 to 200,000+ Lux range.
س: هل هذه المصابيح قابلة للتعتيم، ولماذا هذا مهم؟
ج: Yes, virtually all modern LED examination lights are dimmable. This is vital for two reasons: راحة المريض (تجنب الوهج عند تشغيل الضوء لأول مرة أو خلال المراحل الأقل كثافة أثناء الفحص) و قابلية التكيف الإجرائي (المهام المختلفة تتطلب مستويات إضاءة مختلفة؛ على سبيل المثال، تقييم نسيج واسع مقابل التركيز على غرزة دقيقة).
س5: كيف يمكنني تنظيف وتعقيم رأس الضوء دون إتلافه؟
ج: اتبع دائمًا تعليمات الشركة المصنعة المحددة. بشكل عام، استخدم قطعة قماش ناعمة غير كاشطة مبللة قليلاً بمحلول مطهر خفيف متوافق مع المعدات الطبية (مثل الكحول الأيزوبروبيلي المخفف أو مركب الأمونيوم الرباعي). امسح الأسطح برفق. حرج: تجنب المنظفات الكاشطة والمحاليل القائمة على المبيض على الأجزاء المعدنية، ولا ترش أو تصب السائل مباشرة على رأس الضوء أبدًا، خاصة بالقرب من اللحامات أو فتحات التهوية، لمنع تسرب السوائل والأضرار الكهربائية.
الخاتمة
اختيار wall mounted examination light هو قرار هام يؤثر مباشرة على الكفاءة السريرية، ودقة التشخيص، والجودة الشاملة لرعاية المرضى. إنه أكثر بكثير من مجرد مهمة شراء؛ إنه استثمار في الأدوات الأساسية لممارستك.
كما فصل هذا الدليل، يجب أن يرتكز اختيارك على ثلاثة ركائز: إعطاء الأولوية لجودة إضاءة لا تشوبها شائبة (مؤشر تجسيد اللون العالي واللوكس المناسب)،, ضمان تصميم ذراع قوي وملائم لبيئة العمل لوضعية سهلة ودقيقة، و الالتزام بالتركيب الاحترافي من أجل السلامة والأداء. هذه المعرفة تمكنك من تجاوز الادعاءات التسويقية وتقييم المنتجات بناءً على معايير سريرية جوهرية.
استخدم هذا الدليل كخطوتك الأساسية الأولى. نشجعك على التشاور مع أخصائيي المعدات السريرية ذوي السمعة الطيبة، وطلب نشرات المواصفات التفصيلية، وعند الإمكان، مشاهدة عروض عملية للنماذج المختارة قصيرًا. الضوء المناسب سيشعرك وكأنه امتداد طبيعي لتركيزك الخاص، مضيئًا الطريق نحو نتائج أفضل لكل مريض تخدمه.
مستعد لإضاءة ممارستك؟ [اتصل بفريقنا الفني لمراجعة تخطيط غرفتك بشكل شخصي] أو [حمّل قائمة التحقق التفصيلية لمواصفات ضوء الفحص] لبدء عملية اختيارك بثقة.
ص>