
Examination Lights: A Comprehensive Guide to Optimal Clinical Illumination
In the intricate dance of medical diagnosis, few tools are as fundamental—and yet as frequently overlooked—as the humble exam light. Imagine a dermatologist scrutinizing a subtle rash, a dentist detecting early caries, or a surgeon identifying the precise border of a tissue plane. In each scenario, the quality of illumination directly dictates the accuracy of the assessment. Subpar lighting is more than an inconvenience; it’s a clinical risk factor, contributing to eye strain, diagnostic uncertainty, and procedural error. This pillar page serves as the definitive resource on examination lights, detailing their types, key features, clinical applications, and selection criteria to ensure both practitioner efficacy and patient comfort.
Our guide synthesizes insights from diverse clinical environments—from bustling general practice clinics to specialized surgical suites—grounded in the principles of optical engineering, clinical ergonomics, and stringent industry standards (such as ANSI and IEC). We reference established medical device manufacturers and clinical best practices, committing to an objective, evidence-based comparison. Our goal is to provide the most trusted, in-depth resource on the topic, empowering you to make an informed decision that prioritizes patient safety, staff well-being, and diagnostic confidence.
What is an Examination Light? Defining Clinical Illumination
At its core, an examination light is a specialized medical device designed to provide optimal illumination for inspection, diagnosis, and minor procedures. Unlike general ambient lighting, it is a tool of precision.
Core Purpose and Importance in Medical Diagnostics
The primary purpose of an exam light is to reveal what the unaided eye might miss. Quality clinical lighting achieves three critical goals:
1. Enhances Diagnostic Accuracy: It illuminates details—variations in tissue color, texture, and morphology—that are essential for correct diagnosis. Proper lighting can mean the difference between spotting a precancerous lesion or overlooking it.
2. Reduces Practitioner Fatigue: Inadequate or flickering light forces the eye to constantly adjust, leading to significant strain and headaches during long clinical hours. A stable, bright, and well-directed light source preserves visual comfort and focus.
3. Improves Procedural Safety and Efficiency: Whether suturing a laceration or performing a dental restoration, clear, shadow-reduced illumination allows for more precise and faster work, directly impacting patient outcomes and clinic throughput.
Key Components and Basic Technology
While designs vary, most modern examination lights share a common anatomy:
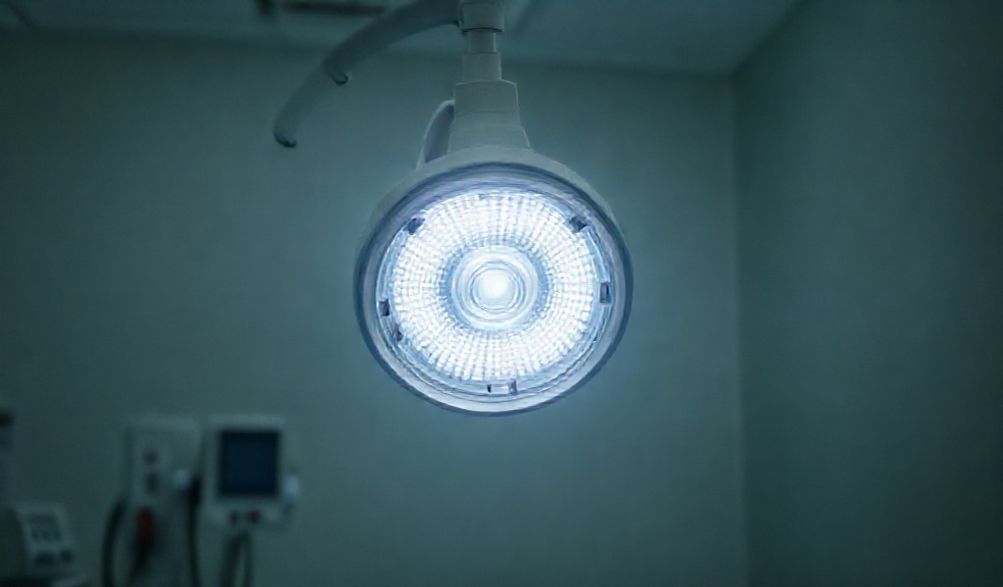
* Light Source: The heart of the system. Historically halogen or fluorescent, now almost universally LED (Light Emitting Diode) for its efficiency and performance.
* Light Head: Houses the light source and optics. Its design determines the quality of the light beam, including shadow control and field uniformity.
* Arm or Boom: The articulated structure that positions the light head. It typically features multiple joints with a counterbalance mechanism (often gas spring or mechanical) for smooth, effortless, and stable positioning.
* Mounting System: How the light is affixed: ceiling, wall, track, floor stand, or mobile cart.
* Control Unit: Allows the user to adjust intensity (dimmability) and, on some models, color temperature. Controls can be on the light head, arm, or a remote footswitch.
Key Features and Specifications: What to Look For
Choosing an exam light requires understanding its technical specifications. Here are the non-negotiable factors.
Brightness and Intensity (Measured in Lux)
Lux measures illuminance—how much light falls on a surface. Clinical needs vary:
* General Examination: 1,000 – 5,000 lux is often sufficient for routine physical exams.
* Detailed Procedures: Dental work, minor surgery, and wound inspection may require 10,000 to 30,000 lux or more at the center of the beam.
Crucially, the light must be dimmable. The ability to reduce intensity is vital for patient comfort (especially in ophthalmology or ENT) and for matching light levels to the specific task.
Color Temperature and Color Rendering Index (CRI)
These two metrics define the quality of the white light.
* Color Temperature (measured in Kelvins, K): Describes the hue of white light. “Warm” light (~3000K) is yellowish, “cool” light (~6000K) is bluish. For clinical work, a neutral white light between 4000K and 5500K is ideal. It provides bright, clear illumination without distorting tissue colors, closely mimicking natural daylight.
* Color Rendering Index (CRI): This is arguably more critical. CRI (scale 0-100) measures a light’s ability to reveal the true colors of objects compared to natural light. A high CRI (>90, with >95 being excellent) is essential for accurately distinguishing between shades of red (inflammation vs. healthy tissue), blue (cyanosis), yellow (jaundice), and the subtle hues of oral mucosa or skin lesions.
Shadow Reduction and Field of Illumination
A single-point light source casts harsh, obstructive shadows. Modern exam lights use advanced optics to minimize this:
* Multi-LED Arrays: Multiple LEDs arranged in a ring or matrix, often with a central lens, create overlapping beams that fill in shadows from instruments or the practitioner’s hands.
* Specialized Reflectors: Engineered reflectors can shape and spread the light to create a uniform, wide field of illumination, ensuring the entire area of interest is evenly lit.
Mobility, Reach, and Positioning (Articulation)
The best light is useless if it can’t be positioned exactly where needed.
* Reach: The horizontal and vertical distance the light head can cover from its mount. Ensure it can cover all potential examination points in your room.
* Articulation: Arms should have multiple, smoothly articulating joints. A quality counterbalance system allows the light head to float effortlessly and stay securely in place once positioned, without drift or droop.
* Cleanability: Light heads and handles are high-touch areas in a clinical environment. They should be designed with seamless, sealed housings that can withstand frequent cleaning and disinfection with hospital-grade agents.
Types of Examination Lights for Different Clinical Needs
The ideal exam light depends entirely on your clinical workflow and physical space.
Ceiling-Mounted Examination Lights
- Pros: Maximizes floor space, offers the greatest range of motion and unobstructed access to the patient from any angle. Ideal for operating rooms, procedure rooms, and dedicated examination suites.
- Cons: Requires professional installation, potentially involving structural ceiling reinforcement. Less flexible if room layouts change frequently.
Wall-Mounted and Track Systems
- Pros: A versatile compromise. Frees up floor space while offering lateral movement along a track. Perfect for clinics with multiple exam areas or where flexibility is needed. Easier to install than ceiling mounts.
- Cons: Reach is limited to the track’s length and the arm’s extension.
Portable and Diagnostic Examination Lights
- Pros: Hand-held, pen-sized, or on small mobile stands. Often rechargeable. Provides ultimate flexibility for quick exams, emergency response, home visits, or as a supplementary light source.
- Cons: Limited brightness and battery life compared to fixed systems. Not suitable as a primary light for detailed, lengthy procedures.
Specialized Lights: Dental, Surgical, and ENT
- Dental Lights: Often integrated into the delivery unit. Feature very high intensity (up to 50,000+ lux), excellent shadow reduction (for work inside the oral cavity), and sometimes built-in saliva ejectors or cameras.
- Surgical Lights (Overhead): While similar in concept, these are more complex, providing deep-cavity illumination with extreme shadow control via multiple LED clusters. They are a category beyond standard exam lights.
- ENT/Headlights: Often worn by the practitioner, providing a focused, coaxial light beam directly in the line of sight, essential for examining narrow cavities like ears, nose, and throat.
The Evolution to LED: Why It’s the Modern Standard
The shift from halogen to LED technology has been transformative for clinical lighting.
Advantages Over Halogen and Fluorescent
- Energy Efficiency & Cool Operation: LEDs consume up to 80% less energy than halogen bulbs. More importantly, they emit very little infrared radiation, meaning the light beam is “cool” and won’t heat up the patient’s skin or the practitioner’s hands—a significant comfort and safety advantage.
- Long Lifespan & Reliability: A quality LED module can last 50,000 to 100,000 hours, effectively eliminating the cost and hassle of frequent bulb replacements common with halogen systems.
- Instant On & Flicker-Free: LEDs reach full brightness immediately and, with a good driver, produce consistent, flicker-free light that reduces eye strain.
- Design Flexibility: The small size of LEDs allows for innovative optical designs in slim, modern light heads.
Understanding LED Quality and Longevity
Not all LEDs are equal. Long-term performance depends on:
* Thermal Management: LEDs degrade with heat. A well-designed light head will have an effective heat sink to dissipate heat away from the LED chips.
* Driver Quality: The electronic driver regulates power to the LED. A high-quality driver ensures stable output, precise dimming, and protects against power surges.
* Lumen Maintenance: Look for specifications like “L70” or “L90,” which indicate the number of hours the LED will operate before its light output falls to 70% or 90% of its initial brightness. This is a more meaningful metric than simple “total lifespan.”
How to Choose the Right Exam Light for Your Practice
Selecting an exam light is a strategic investment. Follow this decision-making framework.
Assessing Your Clinical Workflow and Space
Create a simple checklist:
* Room Dimensions: Ceiling height, room width/depth, location of exam chair/table.
* Primary Procedures: What will you use the light for most? Routine checks, detailed wound care, minor surgery?
* Number of Rooms: Do you need identical lights in every room, or does a specialized room require a different type?
* User Height: Ensure the light’s travel range accommodates all practitioners who will use it.
Budgeting: Initial Cost vs. Total Cost of Ownership
Look beyond the sticker price:
* Initial Cost: The purchase price of the light and installation.
* Total Cost of Ownership (TCO): Includes energy consumption (LEDs save significantly), replacement bulbs/parts (minimal with LED), and potential maintenance costs. A higher-quality, more expensive LED light often has a lower TCO over 5-10 years than a cheaper halogen alternative.
Prioritizing Features Based on Your Specialization
- Dermatology/Plastic Surgery: CRI is paramount. Seek the highest CRI (>95) for impeccable color accuracy.
- Surgery/Minor Procedures: Prioritize maximum intensity and superior shadow reduction.
- General Practice/Family Medicine: Focus on versatility, ease of positioning, and a good balance of intensity and color quality.
- Pediatrics/ENT: Consider dimmability and cool light for patient comfort, and potentially a specialized headlight.
Safety, Maintenance, and Best Practices
Electrical and Clinical Safety Standards
Any medical exam light must comply with IEC 60601-1, the international standard for the safety of medical electrical equipment. This certification ensures protection against electric shock, mechanical hazards, and excessive temperatures. Always verify compliance.
Routine Cleaning and Disinfection Protocols
Follow the manufacturer’s instructions precisely. Generally:
* Use a soft cloth dampened with a mild detergent or recommended hospital-grade disinfectant.
* Avoid abrasive cleaners or solvents that can damage lenses or housings.
* Ensure no liquid enters ventilation slots or control switches.
* Clean handles and light heads after every patient contact.
Troubleshooting Common Issues
- Flickering or Dimming: Check power connections first. For LED lights, this often indicates a failing driver.
- Stiff or Drooping Arm: The counterbalance mechanism may need adjustment or service. Do not force it.
- Light Not Turning On: Verify power source, check fuses, and inspect footswitch or control connections.
- When in Doubt: For any electrical or mechanical issue, contact the manufacturer or a qualified service technician. Do not attempt internal repairs.
Frequently Asked Questions (FAQ) About Examination Lights
Q1: What is the ideal color temperature for a general examination light?
A: A neutral white light between 4000K and 5500K is generally recommended. It provides bright, clear illumination without the yellow tint of warmer lights or the harsh blue cast of very cool lights, allowing for accurate assessment of tissue color and condition.
Q2: How important is the Color Rendering Index (CRI) for a medical exam light?
A: Extremely important. A CRI of 90 or higher (on a scale of 0-100) is considered excellent for clinical settings. It ensures that the colors of skin, blood, tissues, and medications are rendered as accurately as possible under artificial light, which is crucial for diagnosis.
Q3: Can I use a standard LED desk lamp as an examination light?
A: No. Medical examination lights are regulated devices designed with specific intensity, color accuracy, heat management, and safety standards (like being splash-resistant and easy to clean). Standard lamps do not meet these clinical requirements and could lead to diagnostic errors.
Q4: How often should I replace my LED examination light?
A: LEDs have a very long lifespan (often 50,000 hours). Rather than periodic replacement, they are typically used until failure or obsolescence. However, mechanical parts (like arms and joints) may require servicing. Follow the manufacturer’s recommended maintenance schedule.
Q5: Are there examination lights designed for patient comfort?
A: Yes. Features like “cool light” technology (minimal radiant heat), silent operation, and smooth, shadow-reduced illumination all contribute to patient comfort and reduce anxiety during examinations.
Conclusion
Selecting an examination light is a critical investment in clinical accuracy, practitioner ergonomics, and superior patient care. It is far more than a simple appliance; it is a primary diagnostic tool. The decision should be guided by a clear understanding of key factors: sufficient and dimmable intensity (lux), impeccable color quality (high CRI and neutral CCT), effective shadow control, and a form factor that suits your clinical workflow and space.
This guide has been built on a foundation of practical clinical needs and rigorous technical specifications, empowering you to move beyond marketing claims and make an informed, evidence-based choice. We encourage you to audit the lighting in your current practice, use the criteria outlined here as a selection worksheet, and, most importantly, consult with reputable medical equipment providers. Whenever possible, see and test the lights in person or via demonstration to evaluate their feel, performance, and suitability for your specific needs before purchasing.
p>