
The Ultimate Guide to Examination Lights: Types, Uses, and How to Choose
In the intricate ecosystem of a modern healthcare facility, where advanced imaging systems and digital records command attention, a fundamental tool often operates in plain sight: the examination light. This critical piece of equipment is the unsung hero of clinical accuracy, a cornerstone of effective diagnosis and treatment that is frequently overlooked during procurement. From a routine throat check in a pediatrician’s office to a complex minor surgical procedure in a dermatology clinic, the quality, color, and intensity of illumination directly shape patient outcomes.
Poor lighting is more than an inconvenience; it is a clinical risk factor. It can lead to missed details, increased practitioner eye strain, and procedural inefficiencies. Conversely, a superior examination light enhances contrast, reveals true tissue color, and illuminates cavities with precision, turning observation into accurate insight.
This comprehensive guide is designed for healthcare professionals, clinic managers, and procurement specialists. We will demystify the technical specifications, compare the diverse types of lights available, and provide a clear, step-by-step framework for selection. Our goal is to transform you from a passive buyer into an informed decision-maker, capable of choosing an examination light that becomes a seamless, reliable extension of clinical expertise.
What is an Examination Light? Core Function and Importance
At its most basic, an examination light is a purpose-built lighting instrument designed for the detailed observation of body surfaces and orifices. However, to define it merely as a “bright light” is to underestimate its profound role in the clinical process.
Beyond Basic Illumination: The Role of Light in Clinical Accuracy
The primary function of an examination light transcends simple visibility. It is engineered to support diagnostic certainty. Here’s how:
- Contrast Enhancement: A high-quality light improves the contrast between different anatomical structures, making it easier to distinguish a subtle rash, a varicose vein, or the margins of a wound.
- Shadow Reduction: Inadequate lighting casts deep, obscuring shadows. Modern examination lights, especially surgical types, use multiple LED arrays and optical designs to minimize shadows, providing an even, “shadow-free” field that is crucial for depth perception during procedures.
- True Color Rendering: This is perhaps the most critical yet underappreciated aspect. The accurate assessment of skin tones, tissue viability (is it pink, pale, or cyanotic?), and inflammation relies on seeing colors as they truly are. A light with poor color rendering can make a bruise look different or mask the yellow hue of jaundice.
The impact is twofold. For the practitioner, optimal lighting reduces visual fatigue and eye strain during long clinics, preserving focus and stamina. For the patient, it contributes to a perception of professionalism and thorough care, while the cool, comfortable output of modern LEDs enhances physical comfort during examinations.
Key Types of Examination Lights and Their Applications
Not all clinical settings require the same type of light. Understanding the categories is the first step to a correct selection.
Overhead Procedure Lights: For Major and Minor Surgeries
These are the powerhouses of clinical lighting, typically found in environments where invasive or detailed procedural work occurs.
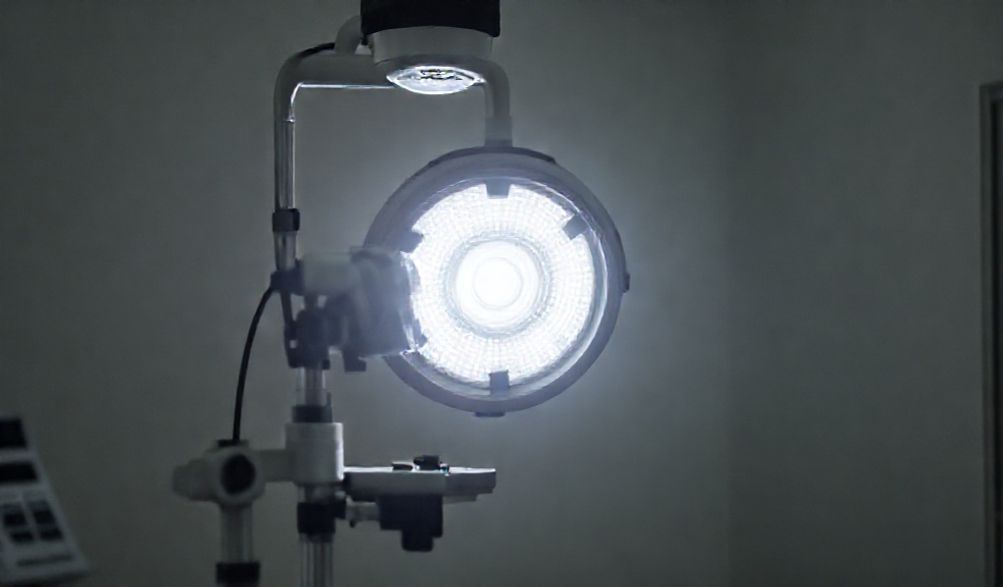
- Description: Usually ceiling-mounted on a track or fixed arm, these lights feature a large, multi-LED array head (often with several hundred individual LEDs) housed in a sterile, maneuverable handle.
- Key Features: Exceptionally high intensity (measured in lux, often 40,000 to 160,000 lux), designed for deep cavity illumination (like in abdominal surgery). They offer superb shadow reduction via coaxial lighting paths, have color temperature adjustment (e.g., switching to a warmer light for better tissue differentiation), and are built for strict aseptic protocol.
- Primary Applications: Operating rooms, labor & delivery suites, outpatient surgical centers, and specialized procedure rooms in dermatology (for excisions) or dentistry (for oral surgery).
Clinical Examination Lights: The Workhorse of the Clinic
This is the most common type of examination light, designed for versatility and daily use in diagnostic settings.
- Description: These come in various forms: wall-mounted (saving floor space), floor-standing on a mobile base, or smaller table-top models. They feature single or double articulated arms for precise positioning.
- Key Features: Adjustable intensity, though lower than surgical lights (typically 10,000 to 40,000 lux). They focus on providing a broad, even field of cool-to-touch light. Ergonomics are key—smooth movement, good balance to stay in position, and intuitive controls.
- Primary Applications: Routine patient examinations in General Practice (GP) offices, pediatrics, ENT, urgent care clinics, and university health centers. They are ideal for checking ears, throats, skin, and for general physical assessments.
Specialized Diagnostic Lights
These are niche tools designed for very specific clinical observations beyond standard white light.
- Description: Lights that utilize specific wavelengths or optical configurations.
- Examples:
- Transilluminators: Use bright, focused light to visualize structures beneath the skin or tissue. A vein finder is a common type, using near-infrared light to map subcutaneous veins. Sinus transilluminators help assess sinus congestion.
- UV (Wood’s) Lamps: Emit long-wave ultraviolet light to cause certain fungal infections (like tinea capitis) or pigment irregularities to fluoresce, aiding in diagnosis.
- Slit Lamps: A cornerstone of ophthalmology and optometry, combining a high-intensity light source with a binocular microscope to examine the structures of the eye.
- Application: They support specialized diagnostic protocols and are often used in conjunction with, not as a replacement for, a primary examination light.
Critical Technical Specifications: What to Look For
Navigating product spec sheets requires understanding a few key metrics. Here’s what truly matters.
Illumination Quality Metrics
- Lux/Luminance: This measures light intensity at the surface (illuminance). More lux is not always better—it must match the task.
- General Examination: 10,000 – 25,000 lux is usually sufficient.
- Minor Surgical Procedures: 40,000 – 100,000+ lux is necessary to see deep into a wound or cavity.
- Color Rendering Index (CRI): On a scale of 0-100, this measures a light’s ability to reveal the true colors of objects compared to natural sunlight. For clinical settings, a CRI >90 is non-negotiable. A CRI of 95+ is excellent and ensures accurate assessment of skin, mucosa, blood, and tissue.
- Color Temperature: Measured in Kelvins (K), this describes the “warmth” or “coolness” of white light.
- Warm White (3500K-4000K): Softer, with more red/yellow tones. Can be easier on the eyes for long periods and may improve contrast for some tissue types.
- Cool White/Daylight (4500K-5500K): Crisper, bluer light that feels brighter and is often preferred for its “alert” quality and similarity to daylight. Many high-end lights offer adjustable color temperature.
Design and Usability Features
- Maneuverability: Consider the light’s “reach.” Can it easily cover your entire examination area? Are the joints smooth and do they hold position without drift? A well-balanced arm reduces user fatigue.
- Thermal Management: LEDs produce heat at their base. Effective heat sinks or active cooling systems are vital. This keeps the light head cool for patient comfort and dramatically extends the LED’s lifespan.
- Infection Control: The housing should be seamless, with no crevices where contaminants can hide. It should be easily wipeable with standard hospital-grade disinfectants without degrading. Sealed optical heads prevent dust and fluid ingress.
The Modern Standard: LED vs. Older Technologies
The shift to LED (Light Emitting Diode) technology has revolutionized medical lighting, rendering older technologies largely obsolete.
Why LED Has Become the Dominant Technology
- vs. Halogen: Halogen lights were once the standard for brightness and color quality. However, they are extremely inefficient, converting over 90% of energy into intense, radiating heat. They have short lifespans (1,000-2,000 hours) and require frequent, costly bulb changes. Their heat output is a patient safety concern.
- vs. Fluorescent: Fluorescent tubes are cooler and more efficient than halogen but suffer from poor CRI (often in the 70s), causing inaccurate color perception. They can flicker, have a delay to full brightness, and contain mercury, posing an environmental hazard.
- The LED Advantage:
- Efficiency & Cool Operation: LEDs use a fraction of the energy and emit minimal radiant heat directly onto the patient.
- Exceptional Lifespan: 30,000 to 50,000 hours is standard. This means over a decade of typical clinical use before light output degrades.
- Superior Performance: Instant on/off, consistently high CRI (>90 easily achievable), and durable solid-state construction.
- Total Cost of Ownership (TCO): While the initial purchase price may be higher, the elimination of bulb replacements, reduced energy costs, and lack of downtime make LED lights far more economical over their lifespan.
How to Choose the Right Examination Light: A Step-by-Step Guide
Step 1: Assess Your Clinical Needs and Workflow
Begin by defining the primary use. Is it for general consultations, detailed wound care, or minor office-based surgery? Observe your current workflow. How often is the light moved? By whom? Does it need to cover one exam table or multiple areas? The answers will point you towards a wall-mounted, mobile floor stand, or ceiling-track model.
Step 2: Evaluate Your Physical Space
Measure your room. For ceiling-mounted lights, ceiling height is critical. Is there convenient power access for a floor stand? Does a wall-mounted unit have clear swing space without obstructing cabinets or doors? Ensure the light’s physical dimensions and reach are compatible with your layout.
Step 3: Prioritize Technical Specifications
Create a checklist based on the earlier sections:
* Must-Have: CRI >90.
* Intensity: Match lux levels to your procedures.
* Ergonomics: Test the smoothness and balance of the arm.
* Infection Control: Verify cleanable, sealed design.
Step 4: Consider Budget, Compliance, and Service
- Budgeting: Prices range from hundreds for a basic table-top unit to tens of thousands for a full-featured surgical light. View this as a 10+ year investment. Factor in the LED TCO advantage.
- Compliance: Ensure the device carries necessary regulatory marks for your region (e.g., FDA listing, CE mark, ISO 13485 certification from the manufacturer). This is non-negotiable for patient safety and liability.
- Service: Inquire about warranty length, local service availability, and the expected cost of any potential repairs. A reputable supplier will provide clear support information.
Frequently Asked Questions (FAQ) About Examination Lights
Q1: What is the most important factor when choosing an exam light?
A: While all specs matter, Color Rendering Index (CRI) is paramount for diagnostic accuracy. A CRI >90 ensures colors of skin, tissue, and blood are seen truthfully, which is essential for correct assessment.
Q2: Can a general exam light be used for minor surgical procedures?
A: It is not recommended. Minor surgical procedures require significantly higher light intensity (lux) and deeper shadow reduction to ensure a clear view of the surgical field. Using an under-powered light can compromise patient safety and procedural outcomes.
Q3: How long do LED examination lights typically last?
A: High-quality LED examination lights have a lifespan of 30,000 to 50,000 hours. Under normal clinical use, this can translate to 10-15 years before a significant drop in luminance, making them a highly durable investment.
Q4: Are there portable examination light options?
A: Yes. Battery-powered, handheld, or compact roll-stand LED lights are excellent for mobile clinics, home healthcare, emergency response, or as supplementary lighting in fixed settings.
Q5: How do I properly clean and maintain my examination light?
A: Always follow the manufacturer’s instructions. Generally, use a soft cloth with a mild disinfectant. Avoid abrasive cleaners or spraying liquid directly onto seams or joints. Regularly check the tension in articulated arms and the condition of cables.
Conclusion
Selecting the right examination light is a strategic decision with direct, daily implications for diagnostic confidence, practitioner well-being, and operational efficiency. It is an investment in the fundamental act of seeing—a tool that transforms light into clinical insight. By moving beyond the simplistic metric of “brightness” to understand the critical roles of CRI, color temperature, ergonomics, and LED technology, healthcare providers can make an empowered choice.
This guide serves as your foundational resource. We strongly encourage you to use this knowledge to engage with reputable manufacturers, ask pointed questions, and, whenever possible, request in-person demonstrations. See the light in action on a simulated tissue pad. Feel the smoothness of its movement. Experience firsthand how the right examination light can illuminate not just your examination field, but the entire path to superior patient care.
p>