
The Ultimate Guide to Wall Mounted Examination Lights: Selection, Benefits & Installation
Introduction
You’re leaning in for a closer look, your focus absolute. A patient presents with a subtle lesion, or a dental prep requires pinpoint accuracy. But the light is wrong—it casts a deep shadow, its color distorts tissue tones, or it’s simply not bright enough where you need it. You adjust your posture, straining your neck and back, trying to catch a better angle. The moment of diagnosis or precision is hampered not by skill, but by inadequate equipment. This frustrating scenario is all too common in medical, dental, and veterinary practices where lighting is an afterthought rather than a foundational tool.
With over a decade of experience equipping clinics and operating rooms, we’ve seen firsthand how the right lighting transforms patient care and practitioner workflow. It’s not just about illumination; it’s about clarity, accuracy, and efficiency. Among the most impactful yet often overlooked solutions is the wall mounted Lumière d'examen. This guide is designed to be your comprehensive resource. We’ll leverage our expertise to help you understand its critical features, navigate the selection process with confidence, and ensure proper installation. By the end, you’ll be equipped to choose a light that enhances diagnostic confidence, improves ergonomics, and optimizes your valuable clinical space.
What is a Wall Mounted Examination Light & Who Needs One?
Core Definition and Key Components
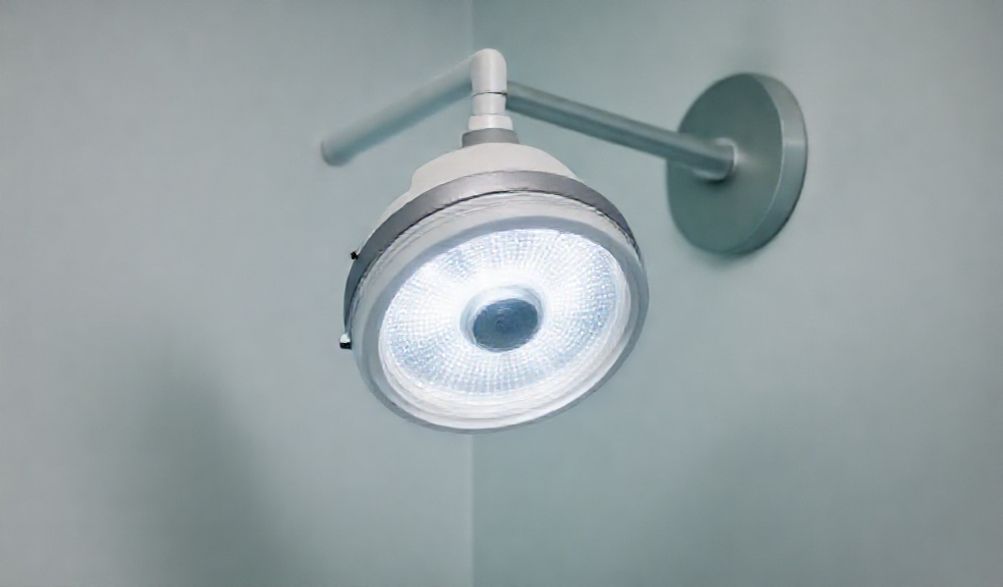
A wall mounted examination light is a specialized medical-grade lighting fixture permanently affixed to a wall. Unlike mobile floor stands or complex ceiling tracks, it is designed to provide high-quality, adjustable illumination specifically for clinical observation and minor procedures. Its core mission is to deliver consistent, shadow-reduced light exactly where the practitioner needs it, without encroaching on the limited floor space of an exam or treatment room.
The system comprises several key components:
* Light Head: The business end, typically featuring an array of LEDs. This is engineered for optimal color rendering and intensity.
* Articulating Arm(s): A series of linked, adjustable segments that allow the light head to be extended, retracted, and positioned horizontally and vertically. Arms may have spring, gas, or friction-based balancing for smooth movement.
* Wall Bracket: The robust mounting plate that securely attaches the entire assembly to the wall structure.
* Control Panel: The interface for operation, which can be integrated into the light head, located on a wall-mounted remote, or activated via a foot switch.
Primary Users and Clinical Applications
The versatility of wall mounted exam lights makes them indispensable across a wide spectrum of healthcare environments:
- Medical Examination Rooms: General practitioners, pediatricians, dermatologists, and ENT specialists rely on them for routine physical exams, wound inspection, dermatological assessments, and otoscopic/ophthalmoscopic procedures.
- Dental Operatories: Crucial for illuminating the oral cavity during examinations, cleanings, and restorative work. The need for deep-cavity illumination and significant shadow reduction is paramount here.
- Surgical & Minor Procedure Rooms: In settings for suturing, biopsies, cyst removals, and other minor surgeries, these lights provide the intense, focused illumination required without the cost of a full surgical ceiling light.
- Veterinary Clinics: For examining animals, treating wounds, and performing minor surgeries, durable and easily adjustable wall lights are essential in the often dynamic environment of a vet practice.
- Aesthetic & Cosmetic Practices: Procedures like Botox injections, filler applications, laser treatments, and skin analyses demand precise, color-accurate lighting to assess symmetry, skin tone, and immediate results.
Key Benefits of Choosing a Wall Mounted Design
Maximizing Space and Improving Ergonomics
In modern clinics, every square foot counts. A wall mounted light eliminates the bulky base of a floor stand, freeing up crucial floor space around the exam chair or table. This removes trip hazards for staff and patients, simplifies cleaning protocols, and creates a more open, professional environment. Ergonomically, it’s a game-changer. Instead of a practitioner awkwardly repositioning a floor stand or their own body, they can smoothly articulate the wall-mounted arm to bring perfect light directly to the field of view. This “light to the work” principle reduces neck, back, and shoulder strain over long clinical days.
Enhanced Stability and Consistent Positioning
Floor-standing lights, even on locking casters, can be inadvertently nudged or can drift. A wall mounted light, once securely installed, offers unwavering stability. When you position it for a specific type of examination or procedure, it stays put. This “set-and-forget” capability is vital for standardizing lighting conditions across patient visits and among different practitioners in the same room, ensuring consistent diagnostic and procedural quality.
Cost-Effectiveness and Simplified Maintenance
Compared to sophisticated ceiling-mounted surgical lights or multi-head track systems, wall mounted units offer a significantly more affordable entry point for high-quality clinical lighting. Their installation is also less invasive and complex than ceiling systems, which often require structural reinforcement and extensive electrical work above the ceiling. From a maintenance perspective, all components are easily accessible for cleaning, bulb/LED replacement (though LEDs last for years), and any necessary mechanical service.
Critical Features to Consider Before You Buy
Métriques de performance d'éclairage
The technical specifications of the light directly impact its clinical utility.
- Lux/Luminosity: This measures light intensity at the target surface. General examinations may require 1,500 to 3,000 lux, while minor surgical procedures demand 5,000 to 10,000 lux or more. Ensure the light can deliver adequate, adjustable intensity for your specific applications.
- Indice de Rendu des Couleurs (IRC) : Perhaps the most critical metric for diagnosis. CRI measures a light’s ability to reveal the true colors of objects compared to natural light. A high CRI (90+ and ideally 95+) is non-negotiable. It allows for accurate differentiation between erythema, cyanosis, jaundice, and healthy tissue.
- Température de Couleur : Measured in Kelvins (K), this describes the “warmth” or “coolness” of the light. Clinical settings often favor cooler white light (4000K – 5500K) as it is perceived as brighter and more alerting, similar to daylight. Some lights offer adjustable color temperature.
- Réduction des ombres : Look for light heads designed with multiple LED points or specialized reflectors/optics that create overlapping beams. This design significantly reduces the obstructive shadows cast by a practitioner’s head or hands, a common flaw with single-point light sources.
Mechanical Design and Usability
The light must be a physical tool that works seamlessly with your workflow.
- Arm Reach and Articulation: Evaluate the total horizontal and vertical reach from the wall. The arm should be able to position the light head centrally over your exam area and retract fully back to the wall. Multiple joints (often 3-5) provide the degrees of freedom needed to navigate around equipment and avoid obstacles.
- Durability and Build Quality: The arm should feel substantial and move smoothly without sagging or wobble. High-quality materials like medical-grade aluminum and steel, with robust bearings at each joint, ensure a long service life despite constant daily adjustments.
- Ease of Adjustment: The system should require minimal effort to position. Test the handle design—is it easy to grip even with gloved hands? Are the friction or spring-balance mechanisms easily adjustable to hold the light head steady at any position?
Operational and Safety Features
- Control Options: Consider how you want to operate the light. Integrated touch controls on the light head are convenient. A separate wall panel or remote keeps controls out of the sterile field. A foot switch is invaluable for hands-free operation during procedures.
- Heat Management: Modern LED lights should generate minimal heat. A “cool-to-touch” light head is essential for patient comfort (especially in dental or pediatric settings) and safety, preventing accidental burns.
- Stérilisation et Nettoyabilité : The entire unit, especially the light head and arm, must have a seamless, non-porous finish that can withstand frequent wiping with hospital-grade disinfectants like bleach or alcohol-based solutions. Absence of cracks, seams, or textured surfaces where pathogens can hide is critical for infection control.
Professional Installation and Maintenance Guidelines
Pre-Installation Planning: Assessing Your Space
Careful planning prevents future headaches. First, determine the optimal mounting location. The standard is typically centered on the wall behind the practitioner, relative to the exam chair or table. Consider the arc of the arm—will it clear cabinets, monitors, or other wall-mounted equipment? Next, assess your wall. Finding wooden studs (for drywall) is essential for secure mounting; for concrete or brick walls, appropriate anchors are required. Verify the proximity of a power outlet, or plan for new electrical work. Always check the light’s weight specifications and ensure your wall can support it.
Aperçu étape par étape de l'installation
We strongly advise that final electrical connection and hardwiring be performed by a licensed electrician. This ensures compliance with local medical facility electrical codes (like NEC in the US) and is crucial for safety and insurance purposes. A general professional installation sequence involves:
1. Locate & Mark: Use a stud finder to locate solid framing members. Mark the precise location for the heavy-duty wall bracket.
2. Mount Bracket: Securely fasten the mounting bracket to the wall studs using the provided heavy-duty lag bolts. For concrete, use appropriate masonry anchors.
3. Assemble & Secure: Attach the articulating arm assembly to the wall bracket, ensuring all locking nuts are tightened to the manufacturer’s specifications.
4. Raccordement électrique : The electrician will run power from the designated circuit to the light’s connection point, ensuring proper grounding and installation of any required switches or controllers.
5. Final Check: Once powered, test the full range of motion of the arm, all light intensity settings, and any control interfaces (touch, remote, foot switch).
Routine Maintenance and Safety Checks
A well-maintained light ensures longevity and safety.
* Quotidiennement/Hebdomadairement : Wipe down the light head and arm with a soft cloth dampened with a mild, non-abrasive disinfectant. Avoid spraying liquids directly onto the unit, especially near joints and controls.
* Monthly/Yearly: Check the tension of the articulating arms. If the light head begins to sag or doesn’t hold position, refer to the manual to adjust the friction mechanism. Visually inspect the power cord (if applicable) and connections for wear. Test all switches and dimming functions.
* Règle d'or : Always follow the specific maintenance and cleaning guidelines provided in the manufacturer’s manual to avoid damage and voiding warranties.
Foire Aux Questions (FAQ)
Q1: What is the typical lifespan of a high-quality LED wall mounted exam light?
R : The LED light source itself is incredibly long-lasting. You can typically expect 50,000 to 100,000 hours of use—which translates to decades of normal clinical operation. The mechanical arm, with its moving parts, will generally be the component that may require service or adjustment long before the LEDs fail.
Q2: Can I install it myself, or do I need an electrician?
R : While physically mounting the bracket to the wall may be within a capable DIYer’s skills, the electrical connection is another matter. For safety, reliability, and compliance with strict medical facility electrical codes, we strongly recommend hiring a qualified, licensed electrician to handle any permanent wiring.
Q3: How do I clean and disinfect the light without damaging it?
R : Use a soft, lint-free cloth lightly dampened with a disinfectant solution recommended for non-critical medical equipment. Wipe surfaces gently. Avoid harsh chemicals, abrasive cleaners, aerosols, or excessive moisture, and never submerge any part of the light. Always defer to the manufacturer’s specific cleaning instructions.
Q4: What’s the difference between a wall mounted light and a ceiling-mounted surgical light?
R : Ceiling-mounted surgical lights are designed for major operating rooms. They are far more complex, offer vastly higher intensity (often 40,000+ lux), larger field diameters, advanced shadow reduction (like twin-head designs), and come with a significantly higher price tag. Wall mounted lights are the ideal, cost-effective solution for examinations, consultations, and minor procedures in smaller spaces.
Q5: How much should I budget for a professional-grade unit?
R : Pricing varies based on features like luminosity, CRI, arm reach, and controls. For a reliable, high-performance LED wall mounted examination light, you can expect a range from approximately $800 to $3,000. View this not as an expense, but as a long-term investment in diagnostic accuracy, practitioner well-being, and efficient clinic workflow.
Conclusion
Choisir la bonne wall mounted examination light is a decisive step toward building a more efficient, accurate, and ergonomic clinical environment. It is a smart investment that pays dividends daily by freeing up space, reducing physical strain on practitioners, and most importantly, providing the clear, true-color illumination essential for confident diagnosis and precise treatment.
As a final piece of expert advice, prioritize quality and specifications that match your specific clinical needs over the lowest price. Partner with reputable medical equipment suppliers who can provide detailed specifications, offer product demonstrations, and stand behind their products with reliable service and support.
Appel à l'action : Take a moment to critically assess the lighting in your key exam or procedure rooms. Is it holding you back? We encourage you to take the next step: download specification sheets for 2-3 recommended models that fit your criteria, or better yet, contact a specialist for a personalized consultation. Ensure your next light is not just a source of illumination, but a cornerstone of exceptional patient care.
p>