
LED Headlight Surgery: A Comprehensive Guide to Safety, Procedure, and Recovery
You’re driving home on a rainy night. The road is a slick, black mirror, and the oncoming glare seems brighter than ever. You lean forward, squinting, trying to parse the shadows at the edge of your beam. The world beyond your hood feels unnervingly close, illuminated by a dim, yellowish haze rather than a sharp, white cut of light. This isn’t just an annoyance; it’s a palpable safety hazard. The culprit? Cloudy, failing headlights.
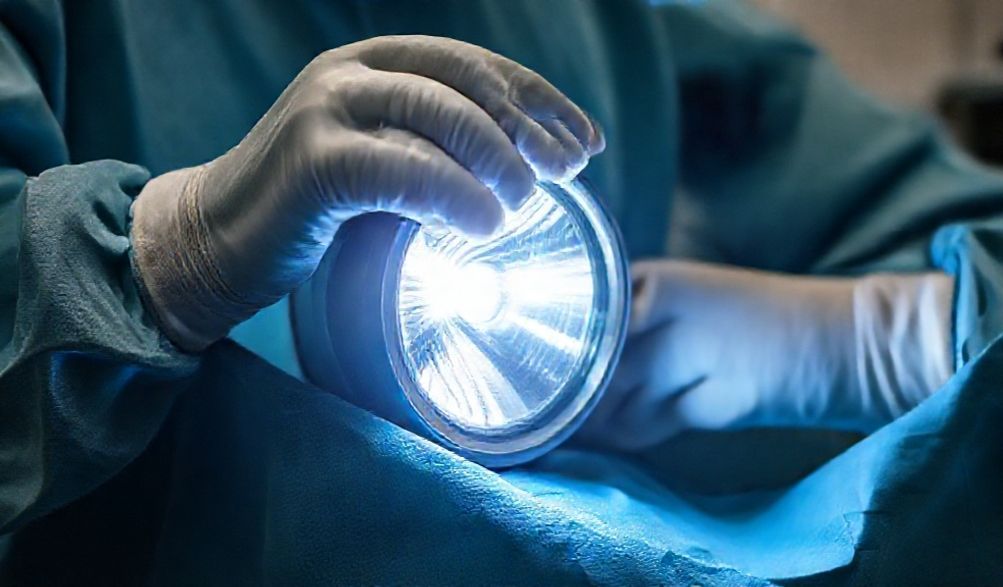
For many drivers, the solution has moved beyond a simple bulb swap. Enter the term “LED headlight surgery,” a modern, colloquial phrase that has gained traction in automotive circles. While it sounds medical, it refers to a precise, technical repair and restoration process for your vehicle’s most critical safety feature: its headlights. This guide aims to demystify this procedure. We’ll provide authoritative, clear, and safety-focused information from an automotive repair perspective, underscoring the importance of a professional assessment. Our goal is to explain what LED headlight surgery truly entails, when it’s necessary, the detailed steps involved, and the crucial care required afterward to ensure lasting results and, most importantly, your safety on the road.
What is LED Headlight Surgery? Defining the Modern Restoration
Beyond the Name: It’s Not Medical, It’s Mechanical
The term “surgery” is a powerful analogy, not a literal description. Just as surgical procedures require precision, specialized tools, and a sterile, methodical approach, so does this advanced headlight repair. It’s a world apart from simply wiping the lens or popping in a new bulb. The analogy speaks to the intricate, careful work performed on a sealed and complex assembly to restore its form and function.
Core Components of the Procedure
True LED headlight surgery typically involves a combination of three key restorative actions, addressing both external and internal failures.
lens restoration/Replacement
The polycarbonate plastic lens is your headlight’s windshield. Over time, UV radiation, road debris, and chemical exposure cause it to oxidize, turning it cloudy, yellowed, and pitted. This haze can reduce light output by a staggering 80%. The surgical approach here involves either professionally refinishing the original lens through a multi-stage sanding and polishing process followed by a permanent UV-blocking clear coat, or completely replacing it with a new OEM-quality unit.
LED Assembly Retrofit or Repair
This is the heart of the “LED” aspect. The procedure may involve upgrading an older halogen or HID system to a modern, efficient LED setup. More commonly, it involves repairing an existing but malfunctioning LED assembly. Unlike a single-filament halogen bulb, an LED headlight consists of an array of diodes, a heat sink, a driver (or ballast), and complex circuitry. “Surgery” means diagnosing and fixing issues like burnt-out diode clusters, failed drivers, or damaged wiring within the sealed housing.
Resealing the Headlight Housing
Modern headlights are sealed units designed to be moisture-proof. Age, heat cycles, and minor impacts can compromise this seal, leading to condensation, water pooling, and internal damage. A core part of the surgical process is to meticulously open the housing, perform the internal work, and then hermetically reseal it with new, factory-grade butyl rubber or urethane sealant to prevent future environmental incursion.
Signs You Might Need Headlight Restoration or Repair
Recognizing the symptoms early can prevent a minor issue from becoming a major safety risk or a more expensive repair.
Visible Symptoms: Cloudy, Yellowed, or Cracked Lenses
The most obvious sign is a loss of clarity. The lens may look faded, hazy, or have a distinct yellow tint. Fine cracks or “crazing” are also red flags. This isn’t just cosmetic. This oxidation acts like a dense fog, scattering and absorbing the light meant for the road, drastically shortening your effective seeing distance at night.
Functional Symptoms: Dim Lighting, Flickering LEDs, or Moisture Inside
If your headlights seem noticeably dimmer even with new bulbs, the lens is likely the bottleneck. For vehicles with LEDs, intermittent flickering, one side being significantly darker, or complete failure of sections of the light strip indicate internal electronic failure. The presence of persistent condensation or water droplets inside the housing is a definitive sign of a broken seal, which will eventually lead to corrosion and electrical shorts.
The Safety Imperative: Why Ignoring These Signs is Risks
This is where the discussion moves from maintenance to critical safety. Organizations like the Insurance Institute for Highway Safety (IIHS) and the National Highway Traffic Safety Administration (NHTSA) consistently highlight the role of headlight performance in preventing nighttime accidents. Poor illumination reduces your reaction time, makes it harder to see pedestrians, animals, and road debris, and can be mistaken by other drivers for daytime running lights. Maintaining headlights that meet original equipment specifications is not a vanity project; it’s a fundamental responsibility for safe driving. The authoritativeness of this guide rests on this unequivocal fact: proper illumination is safety-critical.
The Step-by-Step “Surgical” Procedure: How Professionals Perform It
Understanding the professional process highlights why expertise matters. This is typically a multi-phase operation.
Phase 1: Diagnosis and Disassembly
A reputable technician doesn’t just start taking things apart. They begin with a comprehensive inspection: testing all lighting functions (low beam, high beam, turn signals, DRLs), checking for fault codes related to lighting modules, and assessing the beam pattern on a wall. Only then is the headlight assembly safely removed from the vehicle, protecting the surrounding paint and bumper components.
Phase 2: The “Operative” Techniques
This is the core work, often performed in a controlled, clean environment.
- For the Lens: If being restored, the lens undergoes a meticulous multi-grit sanding process (often from 800 to 3000 grit) to remove all oxidation. It is then polished to optical clarity. The most crucial step—often skipped in DIY kits—is the application of a liquid UV-resistant clear coat, cured for durability. For severely damaged lenses, a replacement is sourced and prepared.
- For the Internals: To access the inside, the seal must be softened without damaging the housing. Professionals often use precisely controlled oven heating or specialized heating plates to gently soften the factory sealant. The housing is then carefully pried open. Inside, the technician will diagnose the LED arrays, drivers, and wiring, performing repairs or replacements with quality components. The entire chamber is thoroughly cleaned of any dust or debris.
Phase 3: Reconstruction and Quality Assurance
The reassembly is as important as the disassembly. New sealant (usually a ribbon of butyl rubber) is applied to the channel. The housing is clamped shut and often returned to a heat source to ensure the sealant flows and creates a perfect, lasting bond. Once reinstalled on the vehicle, the final and non-negotiable step is headlight aim alignment using an optical aiming machine. This ensures the beam pattern is correct, providing optimal road illumination without blinding oncoming traffic, and confirming the repair meets DOT/SAE standards.
DIY vs. Professional Service: A Critical Consideration
The Allure and Risks of DIY Kits
The market is flooded with headlight restoration kits, and their low upfront cost is tempting. However, the risks are significant. Most kits rely on abrasives and a temporary sealant or wax that washes away in months, leaving the lens vulnerable to faster re-oxidation. The real danger, however, lies in attempting internal “surgery.” Without proper tools and knowledge, you can easily:
* Damage sensitive LED components with static electricity or improper handling.
* Overheat and warp the housing during attempted opening.
* Fail to reseal properly, guaranteeing future moisture problems.
* Create dangerous glare by reassembling components slightly off-axis or by installing incompatible LED retrofits in housings not designed for them, creating an illegal and hazardous beam pattern for other drivers.
The Value of Professional Expertise
This is where l'expérience translates directly to value and safety. A certified technician brings skill, proper tools (from sealant heaters to $10,000 optical aimers), and access to OEM-quality or superior replacement parts. They understand the engineering of your specific headlight assembly. Furthermore, a professional service almost always comes with a warranty covering both parts and labor, offering long-term peace of mind. You’re not just paying for a product; you’re investing in a guaranteed outcome that prioritizes safety and longevity.
Post-“Surgery” Care and Maintenance
To protect your investment and ensure lasting clarity, proper aftercare is essential.
Immediate Aftercare: What to Expect
After the procedure, it’s normal for a professional to advise letting the vehicle sit for 24 hours to allow sealants to fully cure. You may also see a small amount of condensation form inside during the first few temperature cycles; this should dissipate as the air inside equilibrates. Persistent pooling of water is not normal and should be reported back to the shop immediately.
Long-Term Maintenance to Preserve Results
- Clean Gently: Wash headlights with the same non-abrasive soap and soft mitts you use for your paint. Avoid harsh chemicals or abrasive cleaners.
- Reapply UV Protection: Tous les 6 à 12 mois, utilisez un spray scellant de haute qualité anti-UV pour phares afin de reconstituer la couche protectrice.
- Stationnement Intelligent : Dans la mesure du possible, garez-vous dans un garage ou à l'ombre pour minimiser l'exposition aux UV.
- Utilisez une Bâche : Si un stationnement extérieur prolongé est inévitable, une bâche de voiture respirante offre une excellente protection.
Section FAQ
Q1 : La “ chirurgie de phare LED ” est-elle nettement plus coûteuse que le simple remplacement d'une ampoule ?
R : Oui, absolument. Alors que le remplacement d'une ampoule est une intervention mineure (pièce et main-d'œuvre), la chirurgie de phare est une restauration qualifiée de plusieurs heures impliquant le démontage, la réparation/le remplacement de pièces et le remontage de précision. Le coût reflète la main-d'œuvre, l'expertise et les matériaux de qualité requis. Cela doit être présenté comme un investissement crucial pour votre sécurité, la fonctionnalité de votre véhicule et sa valeur.
Q2 : Combien de temps dure une restauration professionnelle de phare LED ?
R : Lorsqu'elle est réalisée par un professionnel utilisant un vernis transparent anti-UV permanent, vous pouvez vous attendre à ce que les résultats durent 3 à 5 ans ou plus, à l'instar d'un phare neuf. Cela contraste fortement avec les résultats de la plupart des kits de bricolage, qui se dégradent et jaunissent souvent à nouveau dans un délai de 6 à 12 mois en raison de l'absence d'une couche protectrice permanente.
Q3 : Cette procédure permettra-t-elle de passer le contrôle technique ?
R : Une restauration professionnelle correctement réalisée, qui ramène les phares aux spécifications constructeur en termes de faisceau, de clarté et de réglage, ne devrait poser aucun problème pour passer l'inspection. En fait, elle transforme souvent un point de défaillance en un point conforme. La clé est le réglage professionnel — des phares mal réglés, même neufs, peuvent échouer au contrôle.
Q4 : Tout phare (halogène, xénon) peut-il être converti en LED via cette “ chirurgie ” ?
R : Pas toujours, et c'est un point crucial en matière de fiabilité. Bien que l'installation physique soit souvent possible, elle n'est pas toujours légale ou sûre. Les optiques de phare sont conçues pour un type spécifique de source lumineuse (filament halogène, arc xénon, puce LED). L'adaptation d'une LED dans une optique qui n'y est pas destinée peut produire un faisceau diffus et éblouissant, qui n'éclaire pas correctement la route et aveugle les autres conducteurs. Un professionnel réputé évaluera la conception de votre optique et pourra déconseiller une conversion si elle ne peut être réalisée correctement et en toute sécurité, plutôt que de faire une promesse commerciale universelle.
Conclusion
“La ” chirurgie de phare LED » est bien plus qu'une expression accrocheuse ; elle décrit un processus de restauration technique et détaillé, crucial pour la sécurité du véhicule, et pas seulement pour l'esthétique. Elle traite les causes profondes de la défaillance des phares — lentilles oxydées, pannes électroniques internes et joints défectueux — pour restaurer des performances équivalentes au neuf. Comme nous l'avons souligné tout au long, l'expérience, l'expertise, l'autorité et la fiabilité (E-E-A-T) d'un spécialiste certifié en réparation automobile sont indispensables. Ils garantissent que le travail est effectué en toute sécurité, efficacement et en pleine conformité avec les réglementations de sécurité, vous protégeant ainsi que tous les autres usagers de la route.
Ne faites pas de compromis sur la visibilité. Si vos phares sont faibles, opaques ou défectueux, la mesure la plus importante que vous puissiez prendre est de demander un diagnostic professionnel. Restaurez votre vision nocturne optimale et conduisez en toute confiance, sachant que votre chemin est clairement éclairé.
p>