
Comprehensive Guide to Medical Examination Lights: Types, Uses, and Selection Criteria
Introduction
In the intricate world of healthcare, where a subtle change in tissue color or a faint shadow can hold the key to a diagnosis, the tools we use must be precise. Among the most fundamental yet often underappreciated of these tools is the medical examination light. Far more than a simple source of brightness, these specialized luminaires are engineered to become an extension of the clinician’s senses, directly impacting diagnostic accuracy, procedural safety, and patient comfort.
Unlike standard ambient or surgical lighting, a dedicated medical examination light provides intense, shadow-reduced, and color-accurate illumination specifically for close visual inspection and minor procedures. Choosing the wrong light can lead to eye strain, missed details, and procedural delays. Conversely, the right light enhances clinical confidence and efficiency.
This comprehensive guide serves as an authoritative resource for healthcare professionals, clinic managers, and procurement officers. We will demystify the technology behind these essential devices, explore their diverse types and applications, and provide a clear, step-by-step framework for selecting the optimal medical examination light for any clinical setting. By synthesizing clinical priorities with technical specifications, this guide will empower you to make an informed investment that elevates the standard of patient care.
1. The Critical Role of Lighting in Medical Diagnosis and Procedure
Lighting in a clinical environment is not a utility; it is a diagnostic instrument. Its quality can be the difference between a clear assessment and an uncertain one.
1.1. Impact on Diagnostic Accuracy
Visual diagnosis relies entirely on the clinician’s ability to perceive subtle details. Inadequate or poor-quality lighting is a direct threat to this process.
* Color Discrimination: Conditions like jaundice, cyanosis, pallor, and erythema are diagnosed through color shifts. A light with a low Color Rendering Index (CRI) distorts these hues, potentially leading to misinterpretation. A high CRI (>90) is essential for true color fidelity.
* Texture and Detail: Assessing a rash’s morphology, a wound’s granulation tissue, or the vasculature of the retina requires illumination that minimizes glare and reveals texture. Shadows cast by poor lighting can obscure critical details like a small lesion or a foreign body.
* Clinical Guidelines: Many professional guidelines implicitly assume optimal lighting. For instance, a dermatological exam or a thorough wound assessment standard requires illumination that allows for the discrimination of detail and color that standard room lighting cannot provide.
1.2. Enhancing Procedural Safety and Efficiency
During hands-on procedures, lighting becomes an active tool for safety and precision.
* Shadow Reduction: When a clinician’s head or hands block the light source during suturing, wound debridement, or IV insertion, shadows can create dangerous blind spots. Modern exam lights use design principles—like multiple light points or large, diffused panels—to minimize these obstructive shadows.
* Reducing Practitioner Fatigue: Straining to see in poor light causes significant eye fatigue and headaches, especially over long clinical days. Bright, focused, and consistent illumination reduces this strain, helping maintain clinician focus and reducing the risk of error.
* Workflow Efficiency: A light that is easy to position, stays in place, and provides consistent illumination allows the clinician to work faster and more confidently. In busy settings like emergency departments or outpatient procedure rooms, this efficiency translates directly into improved patient flow.
1.3. Considerations for Patient Comfort and Compliance
The examination experience can be intimidating. Harsh, glaring lights pointed directly at a patient’s face can heighten anxiety and cause physical discomfort (e.g., pupil constriction, tearing).
* Minimizing Glare and Heat: Older halogen lights emitted significant radiant heat, which could be uncomfortable on a patient’s skin. Modern LED-based medical examination lights produce minimal heat. Features like frosted lenses or diffuser panels soften the light’s edge, reducing glare.
* Patient-Centric Design: The ability to smoothly direct the light away from a patient’s eyes during positioning or to dim the intensity for a less invasive initial look contributes to a more compassionate and cooperative clinical encounter.
2. Types of Medical Examination Lights and Their Applications
The ideal medical examination light varies dramatically by setting and task. Here are the primary categories:
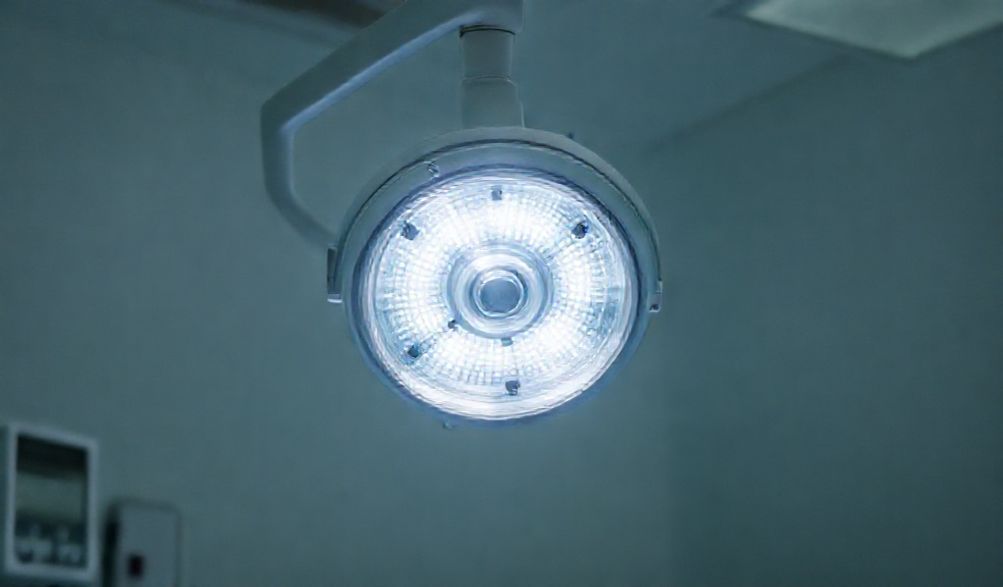
2.1. Overhead Examination Lights (Ceiling-Mounted)
- Description & Mechanism: These are fixed or track-mounted units suspended from the ceiling. They often feature multi-jointed arms for a wide range of motion and are controlled via handles that can be sterilized.
- Ideal Clinical Settings: The workhorse of general examination rooms, procedure rooms, emergency bays, and labor & delivery suites. They provide hands-free, broad-area illumination.
- Pros and Cons:
- Pros: Unobstructed floor space, excellent stability, wide coverage, and typically high-intensity output.
- Cons: Higher installation cost and complexity, limited flexibility if not on a track, and may not be suitable for rooms with very low ceilings.
2.2. Surgical/Procedure Lights
- Description & Mechanism: These are high-performance, ceiling-mounted lights designed for sterile fields. They offer extreme brightness (often 40,000 to 160,000 lux), exceptional shadow reduction via multi-source optics, and deep cavity illumination.
- Ideal Clinical Settings: Operating rooms, minor surgery suites, specialized procedure rooms (e.g., endoscopy, cystoscopy).
- Key Features: Sterile handles, color temperature adjustment to match tissue types, homogeneous light fields, and often integrated camera systems. They are the pinnacle of examination lighting technology.
2.3. Portable and Wall-Mounted Examination Lights
- Description & Mechanism: These versatile lights feature a flexible gooseneck or articulated arm mounted on a wall bracket, rolling stand, or procedure cart. They are often LED-based.
- Ideal Clinical Settings: Multi-purpose rooms, bedside examinations in hospital wards, home healthcare, triage areas, dental offices, and clinics with space constraints.
- Pros and Cons:
- Pros: High flexibility, cost-effectiveness, easy installation, and space-saving. Portable models offer illumination anywhere it’s needed.
- Cons: May have lower maximum intensity than large overhead lights, require cord management (for plug-in models), and can be less stable if on a lightweight stand.
2.4. Specialized Diagnostic Lights
- Description & Mechanism: These are purpose-built for specific diagnostic tasks.
- Applications:
- Transilluminators: Use bright, focused light to visualize structures like sinuses in infants or to locate veins.
- Otoscope/Ophthalmoscope Lights: Integrated into handheld scopes for ENT and eye exams.
- UV (Wood’s) Lamps: Emit ultraviolet light to detect fungal infections (e.g., ringworm), bacterial colonies, and pigment irregularities.
- Dermatoscopes: Use polarized light and magnification to visualize subsurface skin structures, vital for skin cancer screening.
3. Key Technical Specifications and Features to Evaluate
Understanding these metrics is crucial for comparing different medical examination light models.
3.1. Light Source Technology: LED vs. Halogen vs. Fluorescent
- LED (Light Emitting Diode): The undisputed modern standard.
- Benefits: Extremely long lifespan (50,000+ hours), cool operation (minimal infrared/UV radiation), high energy efficiency, instant full brightness, and excellent CRI. Offers the best total cost of ownership.
- Halogen:
- Benefits: Warm light quality, low upfront unit cost.
- Drawbacks: Very hot operation (burn risk, discomfort), short lifespan (1,000-2,000 hours), high energy consumption, and bulbs are sensitive to oils from skin.
- Fluorescent:
- Status: Largely obsolete in new medical equipment. Poor color accuracy (low CRI), potential for flicker (can cause eye strain), contains mercury, and performance degrades in cold environments.
3.2. Illumination Quality Metrics
- Color Rendering Index (CRI): A scale from 0-100 measuring a light’s ability to reveal the true colors of objects compared to natural light. For medical use, a CRI of >90 (and ideally >95) is mandatory. A CRI of 100 is perfect color accuracy.
- Color Temperature (Kelvin – K): Describes the “warmth” or “coolness” of white light.
- Warm White (3000K-4000K): More yellow/red. Can be soothing but may not provide optimal contrast for clinical detail.
- Cool White/Daylight (4500K-6500K): Bluer, crisper light. The 5000K-5500K range is often considered ideal for clinical examination as it closely matches noon daylight, enhancing contrast and visual acuity.
- Luminance & Uniformity:
- Lux: The unit of illuminance (brightness on a surface). Requirements vary:
- General Exam: 2,000 – 5,000 lux
- Minor Procedures (Suturing): 10,000 – 30,000 lux
- Major Surgery: 40,000 – 160,000+ lux
- Uniformity: The light should provide an even field without bright “hot spots” or dim edges, which can cause visual fatigue and inconsistent illumination of the target area.
- Lux: The unit of illuminance (brightness on a surface). Requirements vary:
3.3. Mechanical Design and Usability
- Mobility and Positioning: Evaluate the reach, number of joints, ease of movement, and the locking mechanism. Does it stay precisely where you put it? Are the handles easy to grip and clean?
- Sterilization and Infection Control: Surfaces must be seamless and resistant to common hospital disinfectants (e.g., bleach, alcohol wipes). Look for IP (Ingress Protection) ratings if liquid resistance is critical.
- Durability and Warranty: Assess the build quality of arms and joints. A comprehensive warranty (often 3-5 years on LEDs, 1+ year on mechanical parts) from a reputable manufacturer is a sign of confidence and ensures long-term support.
4. How to Choose the Right Medical Examination Light: A Buyer’s Checklist
Follow this practical framework to narrow your options:
- Assess Your Primary Use Case: Is this for general physicals, wound care clinics, minor surgery, or bedside rounds? The procedure dictates the required lux, CRI, and light field size.
- Evaluate the Physical Space: Measure ceiling height, room size, and layout. Is there space for a floor stand? Would a track system offer future flexibility? Locate power outlets.
- Set a Performance Benchmark: Based on step 1, define your minimum specs: e.g., “≥5,000 lux, CRI ≥93, 5000K color temperature.”
- Prioritize Ergonomics and Workflow: If possible, test a demo unit. Is the handle intuitive? Is the movement smooth? Does it integrate seamlessly into your existing room layout and clinical routine?
- Calculate Total Cost of Ownership (TCO): Don’t just look at the purchase price. For LEDs, factor in 10+ years of use with no bulb changes and low energy bills. For halogen, budget for frequent bulb replacements and higher electricity costs.
- Verify Compliance and Certification: Ensure the device is listed as a medical device with relevant authorities (e.g., FDA in the USA, CE mark in Europe) and is manufactured under a quality standard like ISO 13485.
5. Maintenance, Safety, and Best Practices
Proper care ensures performance and safety over the long term.
5.1. Routine Cleaning and Disinfection Protocols
- Always follow the manufacturer’s instructions (IFU).
- Power off and unplug the light before cleaning.
- Use soft cloths and recommended, non-abrasive disinfectants. Avoid harsh solvents that can damage lenses or housings.
- Pay special attention to handles and frequently touched surfaces.
5.2. Periodic Performance Checks
- Monthly: Visually check for any dimming, color shift, or flickering.
- Annually: Check all arm joints for stiffness or looseness. Verify that locking mechanisms hold firmly.
- Document service dates and any changes in performance.
5.3. Essential Safety Considerations
- Electrical Safety: Ensure proper grounding and avoid using damaged cords.
- Mechanical Safety: Securely mount ceiling or wall units. Ensure floor stands have a wide, stable base to prevent tipping.
- Thermal Safety: Even with cool LEDs, never cover a light or place drapes directly on it. For halogen lights, be acutely aware of the burn risk to patients and staff.
- Trip Hazards: Manage power cords and base tracks to keep them out of walkways.
FAQ: Frequently Asked Questions About Medical Examination Lights
Q1: What is the main advantage of LED exam lights over traditional halogen lights?
A: LED lights offer superior energy efficiency, a much longer operational lifespan (reducing replacement costs and downtime), and minimal heat radiation, which enhances patient comfort and safety during prolonged examinations. They also provide excellent color accuracy critical for diagnosis.
Q2: How many lux (brightness) is typically needed for a general physical examination room?
A: For general examinations (e.g., checking throat, ears, abdominal palpation), a light providing 2,000 to 5,000 lux at the examination point is usually sufficient. For more detailed tasks like suturing or wound debridement, 10,000 to 30,000 lux or more may be required.
Q3: Can I use a standard room light or a high-lumen desk lamp for medical examinations?
A: It is strongly discouraged. Standard lights lack the high CRI for accurate color judgment, create shadows and glare, and often emit too much heat. Medical exam lights are engineered to provide cool, consistent, shadow-reduced, and color-true illumination specifically for clinical observation.
Q4: How often should the bulbs or LEDs in an exam light be replaced?
A: Modern LED modules can last 50,000 hours or more (often 10+ years of clinical use) and typically do not require replacement. Halogen bulbs may need changing every 1,000 to 2,000 hours. Always refer to the manufacturer’s specifications and conduct regular checks for any dimming.
Q5: Are there specific lights recommended for telehealth or teledermatology consultations?
A: Yes, consistent lighting is crucial for accurate digital images. Lights with a high CRI (>95) and a color temperature around 5000K (D50 daylight) are recommended to ensure the colors captured by the camera are true-to-life, allowing for reliable remote assessment.
Conclusion
Selecting the appropriate medical examination light is a critical decision that transcends simple procurement—it is an investment in clinical quality, diagnostic confidence, and patient-centered care. By understanding the spectrum of available lights, from versatile portable units to sophisticated surgical illuminators, and by prioritizing key technical specifications like CRI, color temperature, and lux output, you can make a choice that aligns perfectly with your clinical needs.
Remember to evaluate not just the device, but its integration into your workflow, its long-term cost, and the manufacturer’s commitment to quality and support. The right medical examination light does more than illuminate a wound or an ear canal; it illuminates details, reduces uncertainty, and becomes a silent, reliable partner in delivering exceptional healthcare outcomes. Choose wisely, for the light you select today will shine on countless diagnoses and treatments for years to come.
p>