
MedLED Headlights: The Ultimate Guide to Brighter, Safer, and Smarter Illumination
Introduction
For decades, the warm, yellow glow of halogen bulbs was the universal language of nighttime driving. While they served us well, the automotive lighting landscape has undergone a revolution. Today, drivers are no longer satisfied with mere illumination; they demand superior visibility, enhanced safety, modern aesthetics, and intelligent efficiency. In this quest for better light, LED technology has taken center stage, and among the myriad of options, MedLED headlights have surged in popularity.
But what exactly is a “MedLED headlight”? Is it a genuine technological breakthrough or just clever marketing? For the driver considering an upgrade, the choices can be confusing, and the stakes are high—your safety and the safety of others depend on it.
This comprehensive guide is designed to be your definitive resource. We will cut through the hype and jargon, grounding our exploration in technical specifications, expert automotive insights, and real-world performance considerations. Our goal is to empower you with the knowledge needed to make an informed, responsible decision about upgrading your vehicle’s most critical safety feature: its headlights.
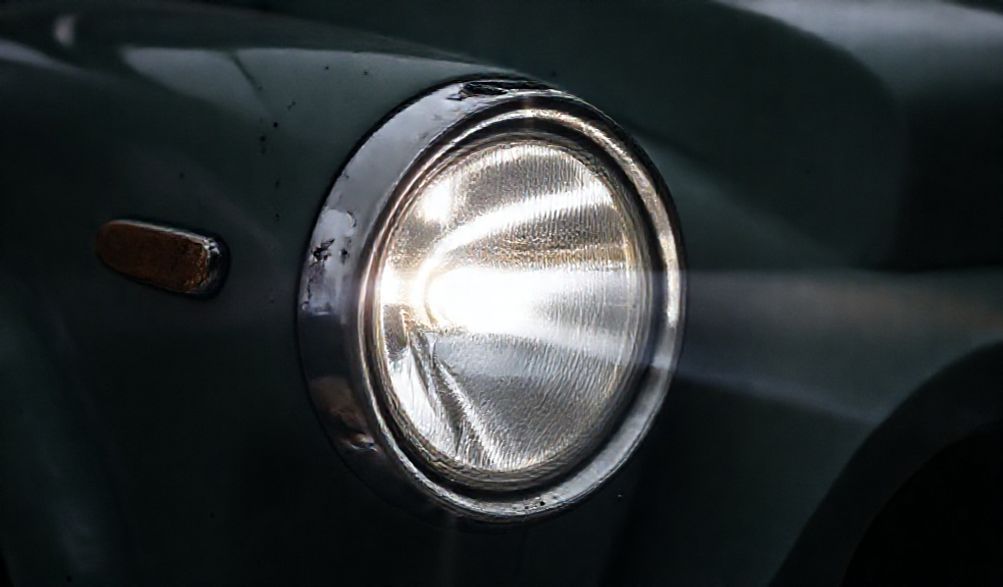
What Are MedLED Headlights? Defining the Technology
At its core, the term “MedLED” refers to a specific style of aftermarket LED headlight assembly. Understanding what it is—and what it isn’t—is the first step to evaluating its suitability for your vehicle.
MedLED vs. Standard LED: Understanding the Difference
The key distinction lies in integration and design. “MedLED” is not a universal technical standard like “HID” or “Halogen.” Instead, it’s a branding and design term that has become synonymous with a complete, projector-style headlight housing that has LED technology fully integrated into its design.
- Standard LED Bulb Replacements: These are direct-replacement bulbs designed to fit into your vehicle’s existing halogen headlight housings. You swap the old halogen bulb for a new LED bulb. While they can be brighter, they often suffer from poor beam pattern compatibility, causing glare and scatter because the reflector bowl was engineered for a halogen filament’s specific light point.
- MedLED Headlight Assemblies: This is a full system upgrade. You replace the entire factory headlight unit (lens, reflector/projector, housing) with a new assembly. The LED chips are permanently mounted in an optimized position behind a projector lens, and the entire system—from cooling to optics—is designed as one cohesive unit. The “Med” style typically features a sleek, blacked-out housing and often includes integrated Daytime Running Lights (DRLs) or signature lighting strips.
In short, think of a standard LED bulb as a new sound source placed in an old speaker box, while a MedLED assembly is a brand-new, high-fidelity speaker system engineered from the ground up.
Core Components and How They Work
A quality MedLED headlight is a marvel of modern engineering, combining several key components:
- High-Output LED Chips: These are the light source. Modern LEDs use chips (like CREE or Philips Lumileds) that produce an intense, focused light with high lumen output and a color temperature (often 5000K-6000K) that mimics daylight.
- Projector Lens Assembly: This is the heart of the system. The LED light is focused through a specially shaped lens (often a clear or frosted “bowl”) and then through a front cutoff shield and lens. This creates the sharp, defined beam pattern with a distinct horizontal cutoff line. This cutoff is crucial—it allows for bright illumination of the road ahead while preventing the upward light scatter that blinds oncoming drivers.
- Heat Sink and Active Cooling: LEDs generate heat at their base. Effective thermal management is critical for longevity. Quality units use large, finned aluminum heat sinks to dissipate heat. Many also incorporate quiet, brushless cooling fans to actively move air over the heat sink, preventing thermal throttling or failure.
- Decorative Housing/Bezel: This is the outer shell that gives the MedLED its distinctive, aggressive, or modern look. It’s typically blacked out and may house the DRLs and turn signal indicators.
This integrated design ensures that light output, beam pattern, and thermal performance are all optimized together—a significant advantage over piecemeal upgrades.
Key Benefits of Upgrading to MedLED Headlights
Upgrading from halogen or even basic LED bulbs to a proper MedLED assembly offers a suite of compelling advantages that impact safety, performance, and aesthetics.
Superior Visibility and Enhanced Nighttime Safety
This is the most significant benefit. MedLED headlights dramatically improve what you can see and how quickly you can see it.
* Increased Luminosity and Clarity: They often produce 2-3 times more usable light (measured in lumens) than standard halogens. The whiter light (higher Kelvin temperature) reduces eye strain and improves contrast, making it easier to distinguish objects, pedestrians, and animals on the road’s edge.
* Precision Beam Pattern: The projector lens creates a wide, even, and sharply defined beam. The road is illuminated uniformly without dark spots or excessive glare zones. This pattern is exceptional at lighting up road signs and lane markings far down the road.
* Reduced Driver Fatigue: The combination of brighter, whiter light and a clean beam pattern means your eyes don’t have to work as hard to resolve details. This leads to less fatigue on long nighttime journeys and can improve reaction times in critical situations.
Increased Energy Efficiency and Reduced Electrical Load
LEDs are inherently more efficient at converting electrical energy into light rather than heat.
* Power Draw Comparison: A typical halogen high/low beam draws 55 watts or more. A full MedLED assembly often draws between 20-40 watts total for both functions. For a vehicle running two headlights, that’s a potential reduction of 30-70 watts of load on your alternator and electrical system.
* System Benefits: This lower draw is especially beneficial for older vehicles, those with start-stop systems, or when you have multiple aftermarket accessories (dash cams, extra lights, sound systems). It places less stress on the battery and alternator, potentially contributing to their longevity.
Modern Aesthetics and Vehicle Customization
MedLED assemblies offer an instant visual transformation. They can modernize the front end of an older vehicle or enhance the aggressive look of a truck or SUV. The blacked-out housings, sleek projector design, and integrated DRL strips or “halo” rings provide a custom, high-end appearance that is difficult to achieve with factory lights. It’s a functional modification that also elevates your vehicle’s style.
Exceptional Longevity and Durability
LEDs are solid-state devices with no fragile filaments.
* Lifespan: Quality LED chips are rated for 30,000 to 50,000 hours of operation. Compared to a halogen bulb’s 450-1,000 hour lifespan, this is essentially a “lifetime” upgrade for most drivers.
* Durability: Without filaments, they are highly resistant to vibration and shock from potholes and rough roads—a common failure point for halogen bulbs. The robust construction of a good assembly also protects against moisture and environmental damage better than aging factory housings.
Critical Considerations Before You Buy
An informed purchase is a smart purchase. Before clicking “buy,” you must understand these crucial, non-negotiable factors.
Legality and DOT/SAE Compliance: A Must-Check
This is the single most important consideration. Not all aftermarket headlights are legal for on-road use.
* The Standards: In the United States, headlights must comply with Federal Motor Vehicle Safety Standard (FMVSS) No. 108, indicated by a DOT (Department of Transportation) stamp. Many also seek SAE (Society of Automotive Engineers) certification, which indicates they meet specific performance and beam pattern standards.
* How to Verify: Look for the “DOT” or “SAE” marking engraved on the lens itself or clearly stated in the product description and documentation. If it’s not explicitly stated, assume it is not street-legal.
* The Risks: Using non-compliant headlights can result in a failed vehicle inspection, traffic citations, and fines. More importantly, illegal lights often have poor beam patterns that create dangerous glare, putting you and other drivers at risk.
The Importance of Proper Beam Alignment
Even a perfectly legal, DOT-approved headlight is dangerous if it’s pointed at the sky. Aiming is not optional.
* Why It Matters: Headlights are designed to be aimed slightly downward. After installation, the new assembly’s position will almost certainly differ from the old one. Misaligned lights (pointed too high) are the primary cause of “that jerk with the blinding LEDs.”
* The Solution: Always have your headlights professionally aimed after installation, or follow a precise DIY guide using a level surface and a wall. This 30-minute procedure is essential for safety and performance.
Compatibility: Plug-and-Play vs. Complex Wiring
“Plug-and-play” sounds ideal, but compatibility varies wildly.
* Vehicle-Specific Kits: These are designed to use your factory headlight connectors and mounting points, making installation relatively straightforward. They may still require aiming and minor adjustments.
* Universal Kits & Wiring: Some models, especially for custom applications, may require running new wiring harnesses, relays, or connecting to battery power.
* Canbus/Decoder Modules: Modern vehicles with a CANbus network monitor bulb resistance. An LED’s low draw can trick the car into thinking a bulb is out, causing hyper-flashing or error messages. You may need small inline resistors or decoder modules to solve this.
* Research: Always check the manufacturer’s fitment guide and search for installation experiences from owners of your specific vehicle make, model, and year.
Heat Management and Build Quality
You often get what you pay for. The market is flooded with cheap, low-quality clones.
* Cooling is Critical: Inadequate heat sinks or failing fans will cause LED chips to overheat, dim prematurely, and fail. Look for products with robust, multi-fin aluminum heat sinks and reliable fan systems mentioned in reviews.
* Build Quality Red Flags: Extremely low prices, lenses made of polycarbonate prone to rapid yellowing/cracking, poor sealing leading to internal condensation, and vague or non-existent warranty information are major warning signs.
* The Smart Investment: Opting for a reputable brand with positive long-term reviews and a solid warranty might cost more upfront but saves money, hassle, and safety concerns in the long run.
Installation and Maintenance Guide
Step-by-Step Installation Overview
While every vehicle is different, the general process follows these steps:
1. Disconnect the Battery: Always start by disconnecting the negative terminal to prevent short circuits.
2. Remove the Old Assembly: This usually involves removing trim pieces, the grille, or sometimes the front bumper to access headlight mounting bolts. Consult a vehicle-specific guide.
3. Unplug and Unmount: Disconnect the electrical connector (often for low beam, high beam, turn signal, and DRL) and remove the bolts holding the assembly in place.
4. Install the New MedLED Assembly: Mount the new unit, reconnect all electrical plugs (using adapters if provided), and ensure it’s seated securely.
5. Reassemble and Test: Reinstall any removed body parts. Reconnect the battery. Test all functions (low beam, high beam, DRLs, turn signals) before finalizing.
6. Aim the Headlights: CRUCIAL STEP. Drive to a shop or aim them yourself against a wall.
Advisory Note: For vehicles requiring bumper removal or complex wiring, professional installation is highly recommended. The cost is often worth the assurance of a correct, secure, and safe job.
Routine Maintenance and Troubleshooting
MedLED headlights are largely maintenance-free, but a little care goes a long way.
* Maintenance: Simply keep the lenses clean. Use a plastic-safe cleaner and a microfiber cloth. Periodically check for any signs of condensation inside the unit, which could indicate a failing seal.
* Troubleshooting:
* One Side Not Working: Check the fuse first, then inspect all connections for corrosion or looseness. Ensure the ground wire is secure.
* Flickering or Error Messages: This typically points to a need for a Canbus decoder or load resistor.
* Condensation Inside: Minor condensation that clears with use is sometimes normal. Persistent pooling of water indicates a bad seal; contact the manufacturer if under warranty.
* When to Seek Help: For any internal electrical failure, LED burnout, or physical damage, contact the seller/manufacturer. Attempting to open and repair a sealed assembly usually voids the warranty and is not recommended.
MedLED Headlights FAQ
Q1: Are MedLED headlights brighter than HID (Xenon) systems?
A: In terms of raw lumen output, high-quality versions of both can be very comparable. The advantage of a well-designed MedLED system is its instant-on capability (no warm-up time), potentially more precise beam pattern from its dedicated projector, and generally simpler reliability without the need for high-voltage ballasts.
Q2: Will MedLED headlights blind other drivers?
A: If they are DOT/SAE compliant and properly aimed, they should not. The science of the projector lens is specifically designed to prevent upward glare. The blinding effect is almost always caused by using non-compliant lights, installing LED bulbs in halogen reflector housings, or failing to aim the lights correctly after installation.
Q3: Can I install MedLED headlights myself?
A: It depends entirely on your mechanical skill and your specific vehicle. For some cars and trucks, it’s a straightforward 30-minute swap. For others, it’s a multi-hour job requiring bumper removal and electrical tweaks. Always, always research a tutorial for your exact vehicle before purchasing.
Q4: Do I need to upgrade my alternator or battery for MedLEDs?
A: Almost certainly not. Since LED systems draw significantly less power than the halogens they replace, they reduce the load on your electrical system. An upgrade would only be necessary if your alternator or battery was already failing.
Q5: Why are some MedLED sets so much cheaper than others?
A: The lower price reflects compromises: cheaper plastics that yellow and crack, inferior LEDs that fade or fail quickly, inadequate cooling, lack of proper optical engineering (resulting in a bad beam pattern), and almost certainly a lack of legitimate DOT/SAE certification. Investing in a quality set from a trusted brand is an investment in safety, performance, and durability.
Conclusion
Upgrading to MedLED headlights represents one of the most impactful modifications you can make to your vehicle. It’s a fusion of enhanced safety through superior visibility, modern efficiency, and striking aesthetics. The road ahead becomes clearer, reactions become quicker, and nighttime driving becomes less fatiguing.
However, this upgrade carries with it a responsibility—to yourself as a driver and to everyone who shares the road with you. The decision cannot be based on price or appearance alone. The path to a successful upgrade is clear: Prioritize products with explicit DOT/SAE certification, invest in a quality set from a reputable source with good reviews and a warranty, and ensure they are professionally aimed after installation.
By following the comprehensive guidance in this article, you can move beyond the confusion and marketing claims. You can confidently select a MedLED headlight system that transforms your nighttime driving experience into one that is genuinely safer, more comfortable, and more enjoyable. Remember, the best headlight upgrade isn’t just the brightest one; it’s the one you can use responsibly, mile after mile, for years to come.
p>