
The Ultimate Guide to Wall Mounted Examination Lights: Selection, Benefits & Installation
Introduction
In the precise world of clinical diagnosis and patient care, few factors are as fundamentally critical—and yet sometimes overlooked—as lighting. The ability to clearly see subtle variations in tissue color, pinpoint the margins of a wound, or illuminate the depths of a cavity can be the difference between an accurate assessment and a missed detail. For decades, the clunky floor-standing or mobile Осветительный прибор для обследования was the standard. But in modern medical environments, where every square foot and every practitioner’s movement counts, a superior solution has taken center stage: the wall mounted examination light.
This fixture represents more than just a change in placement; it’s a strategic upgrade in clinical functionality. By moving the light source off the floor and onto the wall, healthcare facilities unlock a new level of space efficiency, procedural stability, and ergonomic design. Whether you’re outfitting a new clinic, renovating an emergency room bay, or upgrading a dental operatory, choosing the right lighting is a decision that impacts daily workflow for years to come.
This guide is designed to be your comprehensive, authoritative resource. We will move beyond basic product descriptions to synthesize the technical specifications you need to understand, the practical benefits you’ll experience daily, and the crucial installation considerations that ensure long-term performance and safety. Our goal is to equip medical professionals, facility managers, and procurement specialists with the knowledge to make a confident, informed investment in a tool that directly supports superior patient care.
What is a Wall Mounted Examination Light?
Core Definition and Primary Function
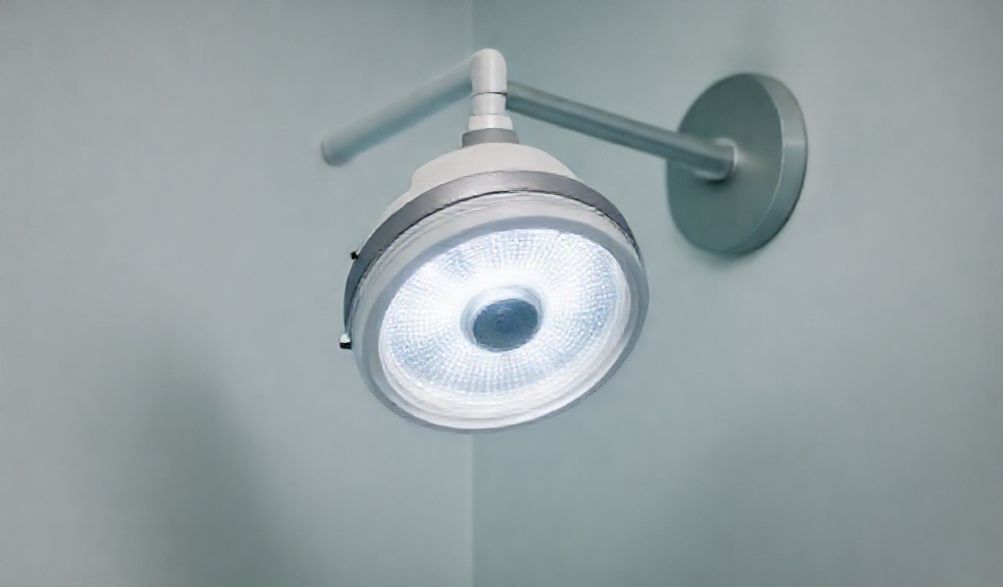
A wall mounted examination light is a specialized medical-grade lighting fixture permanently secured to a wall structure. Its primary function is to deliver intense, focused, and shadow-controlled illumination onto a specific area of a patient’s body during examinations, diagnostic procedures, and minor surgeries. Unlike ambient room lighting, it is a task light engineered for clarity, with optics designed to reveal detail without causing patient discomfort or practitioner eye strain. By being fixed to the wall, it becomes a seamless, always-available part of the clinical workspace.
Key Components and Anatomy
Understanding the components helps in evaluating quality and suitability:
* Light Head: The business end of the unit. In modern lights, this houses an array of high-performance LEDs, a heat sink for thermal management, and sophisticated optics (lenses and reflectors) that shape the beam. The quality of these optics determines the light’s focus, edge sharpness, and depth of illumination.
* Articulating Arm: This is the “reach” of the light. Typically consisting of multiple segments (often two or three) with rotation points at the wall bracket and between segments, it allows the light head to be positioned precisely over the patient. Look for arms that offer a wide range of motion—horizontal reach, vertical lift, and rotational tilt.
* Wall Bracket/Column: The robust mounting interface that attaches the entire system to the wall. It must be engineered to handle the cantilevered weight of the extended arm and light head without sagging or vibrating. Some models feature a vertical column that allows for significant height adjustment before the arm is even deployed.
* Control Interface: How the user operates the light. This can be integrated into the light head or the wall bracket and may include touch-sensitive panels, rotary dials, or buttons. Functions always include on/off and dimming, with advanced models offering color temperature adjustment, preset memory positions, and compatibility with foot switches or remote handles for sterile procedures.
Common Clinical Applications
The versatility of the wall mounted examination light makes it a fixture across numerous specialties:
* General Practice & Family Medicine: For routine physical exams, throat inspections, and dermatological checks.
* Emergency Medicine & Urgent Care: Essential for trauma assessment, wound cleaning, suturing, and foreign body removal in compact ER bays.
* Дерматология: Critical for evaluating skin lesions, moles, and conditions under high-quality, color-accurate light.
* Оториноларингология (ЛОР): Illuminating ears, nasal passages, and the oral cavity for detailed examination.
* Minor Surgery & Procedure Rooms: Used for biopsies, cyst removals, and other outpatient surgical procedures.
* Dental Examinations: Providing clear illumination of the oral cavity for diagnostics and cleanings.
Top Benefits of Choosing a Wall Mounted Design
Maximizing Space and Improving Workflow
In clinical settings, floor space is premium real estate. Mobile lights on stands or bulky floor models consume valuable square footage, create obstacles for rolling equipment like crash carts or ultrasound machines, and present genuine tripping hazards. A wall mounted examination light eliminates this clutter entirely. By tucking the light source against the wall when not in use, the floor around the exam table or procedure chair remains completely clear. This creates a safer, more organized environment and allows for more efficient room layout, which is especially beneficial in compact consultation rooms, multi-bed bays, or high-traffic clinics.
Enhanced Stability and Consistent Positioning
A mobile light, by its nature, is susceptible to subtle shifts. A bump from the hip, a vibration from a closing door, or even the movement of the patient can cause the light to drift, requiring constant repositioning. A wall mounted light, securely anchored to a solid structural wall, provides rock-solid stability. Once positioned, it stays put. This vibration-free performance ensures consistent, unwavering illumination throughout a procedure, which is crucial for tasks requiring fine motor skills and prolonged focus. The practitioner can work with confidence, knowing their light field will not change unexpectedly.
Ergonomic Advantages for Practitioners
Healthcare professionals are at high risk for musculoskeletal strain. Traditional floor lights often require a practitioner to bend, push a heavy base, or awkwardly grip a stem to reposition the light. A wall mounted model transforms this interaction. The adjustable arm is counterbalanced or uses friction mechanisms that allow smooth, effortless movement with just a light touch of the hand on the cleanable light head or a sterile handle. This reduces physical exertion, minimizes repetitive strain, and allows for much faster repositioning as the focus of an exam or procedure shifts. It’s an ergonomic upgrade that contributes directly to staff well-being and efficiency.
Critical Features to Consider Before You Buy
Параметры световых характеристик
This is the core of the light’s diagnostic capability.
* Lux/Illuminance: This measures the intensity of light falling on a surface. For detailed tasks like minor surgery or suturing, recommendations often call for 40,000 to 160,000 lux or more at the center of the beam. For general examinations, 20,000-40,000 lux may be sufficient. Ensure the light can deliver the required intensity at a typical working distance (e.g., 75-100 cm).
* Индекс цветопередачи (CRI): Perhaps as important as intensity, CRI measures how accurately a light source reveals the true colors of objects compared to natural light. For accurately assessing tissue health, inflammation, cyanosis, or jaundice, a CRI of 90 or higher (out of 100) is essential. A light with a poor CRI can make tissues look washed out or misleadingly tinted.
* Color Temperature: Measured in Kelvins (K), this describes the “warmth” or “coolness” of the white light. A range of 4000K to 4500K is generally considered a “neutral white” that is bright and clinical without being harshly blue (like 6000K daylight) or overly warm and yellow (like 3000K). Some advanced lights offer adjustable color temperature.
Mechanical Flexibility and Reach
The best light is useless if it can’t be positioned where you need it.
* Достижимость и подвижность: Evaluate the arm’s horizontal reach (how far it can extend from the wall) and vertical range (how high it can lift from its lowest point). The arm should have enough articulation to position the light head directly over a patient on an exam table from a wall-mounted position to the side. Look for multiple pivot points that allow the light to be “folded” out of the way when not in use.
* Movement and Locking: The arm should move smoothly, without sticking or requiring excessive force. Once positioned, the locking mechanisms (often friction-based or using internal brakes) must hold the light securely in place, even at full extension.
Durability and Ease of Maintenance
Medical lights are long-term investments subject to frequent cleaning and adjustment.
* Build Quality: The housing and arm should be constructed from medical-grade materials like anodized aluminum or high-quality polymers that can withstand repeated disinfection.
* Ingress Protection (IP Rating): An IP rating (e.g., IP44, IP54) indicates protection against dust and liquid ingress. A rating of IP54 or higher is advisable, meaning it is protected against dust and water splashes from any direction, facilitating safe and thorough cleaning.
* LED Lifespan: Quality LED modules are rated for 50 000 часов и более. This translates to over a decade of typical clinical use before any noticeable degradation in light output, virtually eliminating bulb replacement costs and downtime.
Control Systems and User Interface
Consider how the light will be used in your specific workflow.
* Control Types: Touch controls on the light head are common and intuitive. Foot switches are invaluable in sterile fields, allowing hands-free operation. Remote handles (often sterilizable) offer the ultimate in aseptic control.
* Функции: Beyond dimming, consider if you need preset memory buttons to recall favorite positions for different procedures, automatic brightness adjustment, или thermal management indicators.
Professional Installation and Safety Guidelines
Pre-Installation Site Assessment
Proper installation begins long before the first screw is turned.
1. Wall Structure Analysis: This is paramount. The light must be anchored into solid wood or metal studs, or into concrete/brick using appropriate anchors. Hollow or partition walls are generally unsuitable without significant reinforcement. Use a stud finder to locate the center of studs.
2. Optimal Height Placement: The mounting bracket should typically be installed so the center of the pivot is approximately 6 to 6.5 feet (180-200 cm) from the floor. This provides an ideal range of motion for both seated and standing procedures relative to a standard exam table.
3. Электрического планирования: A dedicated electrical outlet should be located near the mounting point. The installation must be planned so that power cables are neatly routed and secured, often through the wall or in a raceway, to prevent snagging.
Step-by-Step Installation Overview
This is a general overview. Always follow the manufacturer’s specific installation manual and employ qualified personnel.
1. Mounting Bracket Securement: Using the provided template, mark and drill pilot holes into the confirmed wall studs. Securely fasten the heavy-duty wall bracket using the appropriate lag bolts or concrete anchors. The bracket must be perfectly level.
2. Arm and Light Head Assembly: Assemble the articulating arm segments as per instructions and attach them to the wall bracket. Then, attach the light head to the end of the arm.
3. Electrical Connection: A qualified, licensed electrician must perform this step. They will connect the light’s power cable to the electrical supply, ensuring all connections are secure and compliant with national and local electrical codes (e.g., NEC in the US).
4. Final Calibration and Testing: Once powered, test all arm movements, locking mechanisms, and control functions. Check for any wobble or drift at full extension. Adjust counterbalance springs if the model has them.
Essential Safety and Compliance Checks
- Соответствие нормам: Installation must adhere to all applicable electrical codes и building regulations. In some jurisdictions, medical devices may have additional compliance requirements.
- Shadow Management: During the planning stage, consider the primary user’s position relative to the patient and the light. The light should be mounted to minimize the practitioner casting their own shadow onto the work area. This often means mounting on the wall opposite the practitioner’s dominant hand.
- Pre-Use Inspection: Establish a routine for staff to visually inspect the light for any loose components, damage to the arm, or flickering LEDs before use.
Часто задаваемые вопросы (ЧЗВ)
Q: How much wall space and clearance do I need for a wall mounted exam light?
О: You typically need a clear vertical wall space of 24 to 36 inches (60-90 cm) wide рядом с зоной осмотра. Что еще более важно, убедитесь, что полный радиус вращения и выдвижения кронштейна свободен от шкафов, полок, мониторов или другого настенного оборудования. Представьте, что кронштейн движется по всей своей траектории — ничто не должно ему мешать.
В: Можно ли установить светильник на любой тип стены?
О: С точки зрения безопасности — нет. Идеальным и самым безопасным основанием является капитальная стена с каркасом (гипсокартон по деревянным или металлическим стойкам). Для бетонных, шлакоблочных или кирпичных стен требуются специальные усиленные дюбели для каменной кладки. Пустотелый гипсокартон (без крепления к стойкам), стены из штукатурки и дранки или временные перегородки, как правило, не подходят, так как они не выдерживают динамическую нагрузку. В таких случаях требуется значительное усиление или другое решение для монтажа (например, колонна от пола до потолка).
В: Стоит ли инвестировать в светодиодные настенные осветительные приборы для осмотра?
О: Безусловно, да. Хотя первоначальная цена покупки может быть выше, чем у старых галогенных моделей, совокупная стоимость владения гораздо ниже. Светодиоды потребляют на 60-70% меньше энергии,, выделяют минимальное лучистое тепло (повышая комфорт пациента) и имеют срок службы свыше 50 000 часов,, что исключает затраты на замену ламп и трудозатраты. Кроме того, они обеспечивают мгновенный, без мерцания свет полной интенсивности и сохраняют превосходную цветопередачу на протяжении всего срока службы.
В: Как правильно очищать и дезинфицировать светильник?
О: Всегда руководствуйтесь конкретными инструкциями производителя. Общие лучшие практики включают: 1) Выключите светильник и дайте ему остыть. 2) Используйте мягкую, безворсовую салфетку, смоченную мягким дезинфицирующим средством больничного класса, безопасным для электроники и пластика. 3) Аккуратно протрите головку светильника, кронштейн и органы управления. 4) Избегайте абразивных чистящих средств, скребков или растворов на основе хлорки. 5) Никогда не распыляйте жидкость непосредственно на светильник; распыляйте средство на салфетку, а не на прибор. 6) Следите, чтобы влага не скапливалась вокруг соединений или панелей управления.
Заключение
Решение интегрировать wall mounted examination light в ваше клиническое пространство является стратегическим и окупается за счет повышения эффективности, безопасности и качества ухода. Это не просто осветительный прибор; это эргономичный инструмент, который экономит ценное пространство на полу, обеспечивает стабильное освещение для точной диагностики и снижает физическую нагрузку на медицинский персонал.
Как мы выяснили, ключ к успешному выбору заключается в сбалансированной оценке. Расставьте приоритеты по основным показателям производительности — достаточной люксах для ваших процедур и отличному CRI (Индекс цветопередачи) для точной цветопередачи — затем убедитесь, что механические параметры, досягаемость и гибкость кронштейна, соответствуют планировке вашего помещения и рабочему процессу. Не идите на компромисс в вопросах прочности и удобства очистки (обратите внимание на степень защиты IP), поскольку эти светильники должны годами выдерживать сложные условия эксплуатации.
Наконец, невозможно переоценить важность профессиональной установки. Консультация с квалифицированным биомедицинским техником или монтажником на этапе планирования гарантирует, что выбранный вами светильник совместим с вашим помещением, а его монтаж будет выполнен безопасно, надежно и в соответствии со всеми нормами. Инвестиции времени и ресурсов в выбор и установку правильного wall mounted examination light — это, в конечном счете, прямая инвестиция в повышение точности диагностики, благополучие специалистов и высочайший стандарт ухода за пациентами.
p>