
Dental LED Light: A Complete Guide to Modern Curing Technology
If you’ve ever had a dental filling, sealant, or bonding, you’re intimately familiar with the experience: the sound of the drill subsides, your dentist places a putty-like material into your tooth, and then asks you to put on a pair of funny-looking orange glasses. Next comes the flash of an intense, vibrant blue light. For many, this is a curious, almost sci-fi moment in the dental chair. But that brief pulse of blue light is far more than a spectacle—it’s a critical, behind-the-scenes technology ensuring the longevity, strength, and success of your dental restoration.
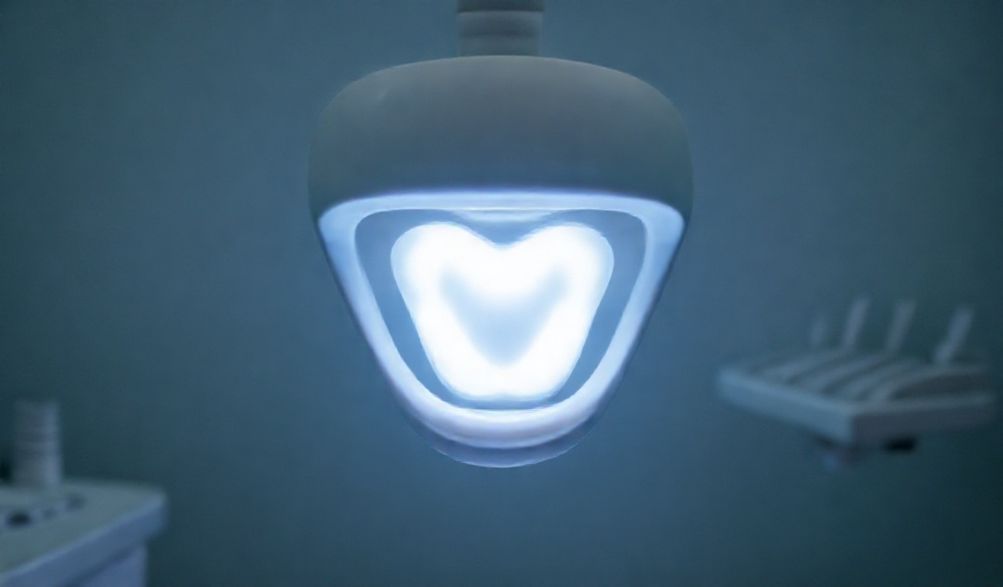
This device is a dental LED curing light, and it represents one of the most significant technological leaps in modern restorative dentistry. It’s the tool that transforms soft, malleable resin into a hard, durable part of your tooth. Yet, for most patients, how it works and why it’s so important remains a mystery.
The purpose of this guide is to demystify this essential piece of dental technology. We’ll explore what a dental LED light is, how it works, the tangible benefits it offers you as a patient, and what you can expect during a procedure. Our goal is to serve as a trustworthy, comprehensive resource, compiling information from dental material science principles, manufacturer guidelines, and insights into standard clinical practice to educate and empower you about your dental care.
What is a Dental LED Light and How Does It Work?
At its core, a dental curing light is a specialized tool designed for one primary task: to harden light-activated dental materials. These materials, known as composite resins, are the tooth-colored fillings, cements, and adhesives that have become the standard for modern, aesthetic dentistry. The curing light is the catalyst that makes them functional.
The Core Function: Photo-Polymerization
The magic word here is photo-polymerization. Let’s break that down simply:
* Photo: Means light.
* Polymerization: Is the chemical process of linking small molecules (monomers) into long, strong chains (polymers).
Dental composite resin is supplied as a paste containing monomers and a special chemical called a photo-initiator (often camphorquinone). When the specific blue light from the LED curing lamp hits this photo-initiator, it becomes excited and starts a rapid chain reaction. This reaction causes the monomer molecules to link together into a solid, cross-linked polymer network—essentially, the paste hardens into a tough, durable plastic right in your tooth. Without this light, the material would remain soft and unusable.
Why “LED”? The Technology Advantage
LED stands for Light Emitting Diode. To appreciate why LEDs are now the universal standard, it helps to understand what came before: halogen curing lights.
Halogen lights worked on a similar principle but used a superheated halogen bulb to produce white light, which was then filtered to get the necessary blue wavelengths. This process was inefficient and problematic:
* Hot: They generated significant heat, which could be uncomfortable for the patient and potentially damage the tooth’s pulp.
* Slow: Curing times were longer (often 40-60 seconds).
* Inconsistent: The bulbs degraded quickly, leading to a gradual but significant drop in curing intensity without the dentist necessarily realizing it.
* Bulky: They were often large, corded units with limited mobility.
LED technology solved these issues:
* Cooler: LEDs produce very little infrared radiation, meaning they emit minimal heat, enhancing patient comfort and safety.
* Faster: They deliver high-intensity light instantly, reducing typical curing times to 10-20 seconds.
* Consistent & Long-Lasting: LEDs have an exceptionally long lifespan (thousands of hours) and maintain a consistent light output throughout their life.
* Energy-Efficient & Portable: They are highly efficient, allowing for cordless, lightweight, ergonomic designs that give dentists greater ease of use.
The Spectrum of Success: Why Blue Light?
You might wonder why it’s always a blue light. The answer lies in the chemistry of the materials. The most common photo-initiator in dental resins, camphorquinone, is specifically activated by light in the blue-violet region of the visible spectrum, with a peak sensitivity around 460-480 nanometers (nm). Modern LED lights are engineered to emit a concentrated, high-power beam in this exact wavelength range, maximizing the efficiency of the polymerization reaction. It’s not ultraviolet (UV) light; it’s a specific, visible blue light chosen for its perfect chemical match to the dental materials.
Key Benefits of Modern Dental LED Curing Lights
The shift from halogen to LED isn’t just a minor upgrade; it represents a major advancement that benefits everyone involved, most importantly, the patient.
For the Patient: Stronger, Longer-Lasting Restorations
This is the most crucial benefit. A properly cured restoration is a successful restoration. LED lights provide a more reliable and complete cure, which translates directly to:
* Higher Strength and Wear Resistance: A fully polymerized resin achieves its maximum physical properties, meaning your filling is better able to withstand the immense chewing forces in your mouth.
* Better Bond Strength: Complete curing ensures a strong, stable bond between the filling and your natural tooth structure, sealing out bacteria and preventing secondary decay.
* Reduced Polymerization Shrinkage: All resins shrink slightly as they harden. A controlled, optimal cure from an LED light helps manage this shrinkage, minimizing stress on the bond and reducing the risk of post-operative sensitivity or marginal gaps.
* Improved Longevity: All the factors above contribute directly to the durability of your dental work, helping your fillings, crowns, or veneers last for many years.
For the Patient: Increased Comfort & Safety
The patient experience is markedly better with LED technology:
* Thermal Safety: The minimal heat output eliminates the discomfort and pulpal risk associated with older, hot halogen lights.
* Fetter Procedure Times: Shorter curing cycles mean less time your mouth is open and less overall time in the dental chair.
* Eye Safety: While the blue light is not dangerous, its high intensity can cause temporary retinal afterimages (like looking at a bright camera flash). The standard practice of providing amber-orange protective glasses for the patient (and often the dentist) effectively filters out the blue light, making the procedure completely safe for your eyes.
For the Dental Practice: Precision and Efficiency
For your dentist, the LED curing light is a precision instrument that enhances care:
* Consistent Output: Dentists can trust that the light is delivering the correct intensity every time, which is fundamental for predictable results.
* Multiple Curing Modes: Advanced lights offer modes like Soft-Start (gradually increasing intensity) or Ramp curing, which can further reduce shrinkage stress and improve bond strength for specific materials.
* Portability and Ergonomics: Cordless, pen-style lights allow easy access to all areas of the mouth, ensuring even hard-to-reach back teeth can be cured effectively.
What to Expect During a Procedure Using an LED Curing Light
Knowing what will happen can ease dental anxiety. Here’s a typical step-by-step process when a curing light is used for a filling:
Step-by-Step in the Chair
- Preparation: After removing decay and preparing the tooth, your dentist will isolate the area (often with a small rubber dam) to keep it clean and dry.
- Material Placement: The tooth-colored composite resin is placed into the cavity in layers, especially for deep fillings. This layering technique is crucial for a complete cure.
- Protective Gear: You will be given a pair of orange-tinted safety glasses to wear. Your dentist and assistant will likely wear them as well.
- Positioning and Curing: Your dentist will position the tip of the LED light as close as possible to the surface of the resin material. They will activate the light, and you’ll see the bright blue glow. They will hold it steady for a specific time—usually between 10 and 40 seconds per layer, as dictated by the material’s instructions.
- Layering: For a deep filling, the dentist will cure one layer, then add the next, and cure again. This ensures the light penetrates fully to harden the entire depth of the material.
- Final Shaping and Polishing: Once fully hardened, the restoration is sculpted, adjusted to your bite, and polished to a smooth, natural-looking finish.
Addressing Common Patient Concerns
- “Is the light hot?” You may feel a very slight warmth at most, but it is generally not noticeable. The LED light produces significantly less heat than the sun on a sunny day.
- “Is it safe for my eyes?” Yes. With the provided protective glasses, the blue light is filtered out. It is a standard safety protocol in every dental office using this technology.
- “Why do you cure it in sections?” Light can only penetrate the resin material to a certain depth. Curing in thin layers guarantees that every part of the filling, from top to bottom, receives enough light energy to harden completely. A single, long cure on a thick blob of material would leave the bottom soft and weak.
Choosing the Right Equipment: A Dentist’s Perspective
For dentists, selecting and maintaining a curing light is a serious professional decision, as it directly impacts clinical outcomes. Here’s what goes into that choice:
Key Features Dentists Look For
- Light Intensity (measured in mW/cm²): This is the power output. A higher intensity can reduce curing time and ensure a sufficient cure, especially for deeper shades or thicker materials. Adequate power is non-negotiable for reliable results.
- Curing Modes: Beyond a standard constant mode, features like Soft-Start (which begins at a low intensity and ramps up) can help reduce stress at the bonded interface. Ramp and Pulse modes offer different curing dynamics for advanced material systems.
- Ergonomics and Battery Life: A lightweight, well-balanced, cordless light reduces hand fatigue for the dentist during a long day. A long-lasting battery that can hold a charge through a full day of procedures is essential for uninterrupted workflow.
Maintenance and Calibration: Ensuring Ongoing Accuracy
A curing light is not a “set it and forget it” tool. Its intensity can subtly degrade over time. Responsible dental practices perform regular maintenance:
* Radiometer Testing: Dentists and assistants use a small device called a radiometer to measure the actual light intensity output of the curing light. This is done regularly (e.g., weekly or monthly) to verify the light is performing within the required specifications.
* Tip Cleaning and Inspection: The light guide tip must be kept clean and free of scratches or resin debris, as contamination can scatter the light and reduce its effective intensity at the tooth.
This commitment to calibration underscores a fundamental principle of quality dentistry: the best materials and techniques are only as good as the tools that deliver them.
Frequently Asked Questions (FAQ)
Q: Is the blue light from a dental curing light harmful?
A: No. The light is in the visible blue spectrum, not UV. Combined with the protective orange glasses you wear, which are designed to block this specific wavelength, it poses no risk to your eyes or skin.
Q: How long does it take for a filling to harden with the light?
A: The polymerization reaction begins instantly. However, your dentist will apply the light for a specific, recommended time (usually 10-40 seconds per layer) to ensure the chemical reaction goes to completion throughout the entire depth of the material, making it fully hard and strong.
Q: Can I eat right after a filling is cured with an LED light?
A: While the material itself is fully hardened and set the moment the light is turned off, your dentist will likely advise waiting until any local anesthetic wears off (usually 1-2 hours) to avoid accidentally biting your cheek or tongue. There is no need to wait for the filling to “set” further.
Q: Do all dentists use LED curing lights now?
A: LED technology is the unequivocal modern standard of care. The vast majority of dental practices have upgraded from older halogen units due to the significant advantages in performance, patient comfort, and reliability. It is a hallmark of a contemporary, evidence-based practice.
Q: Why does my dentist sometimes use a smaller light tip?
A: Smaller, tapered tips are used for hard-to-reach areas, like the tight spaces between teeth or on the back surfaces of molars. They allow the dentist to direct the light beam precisely onto the material, ensuring an optimal cure even in confined areas.
Conclusion
The humble dental LED curing light is a cornerstone of modern, effective, and comfortable restorative dentistry. Far from being just a source of a futuristic blue glow, it is a precision instrument rooted in sophisticated chemistry and engineering. Its role is pivotal: it directly determines the strength, longevity, and success of the tooth-colored restorations that preserve both the function and beauty of your smile.
Understanding the tools and procedures used in your care fosters a stronger, more informed patient-dentist partnership. It transforms a mysterious flash of light into a recognized symbol of quality and technological progress. We encourage you to see it as such and to feel empowered to ask your dentist about the technology they use in their practice.
Ultimately, quality dental care rests on two pillars: the skill and expertise of your dentist, and the precision and reliability of their evidence-based technology. The advanced dental LED curing light stands as a prime example of how this partnership works to deliver the best possible outcomes for your oral health.
p>